
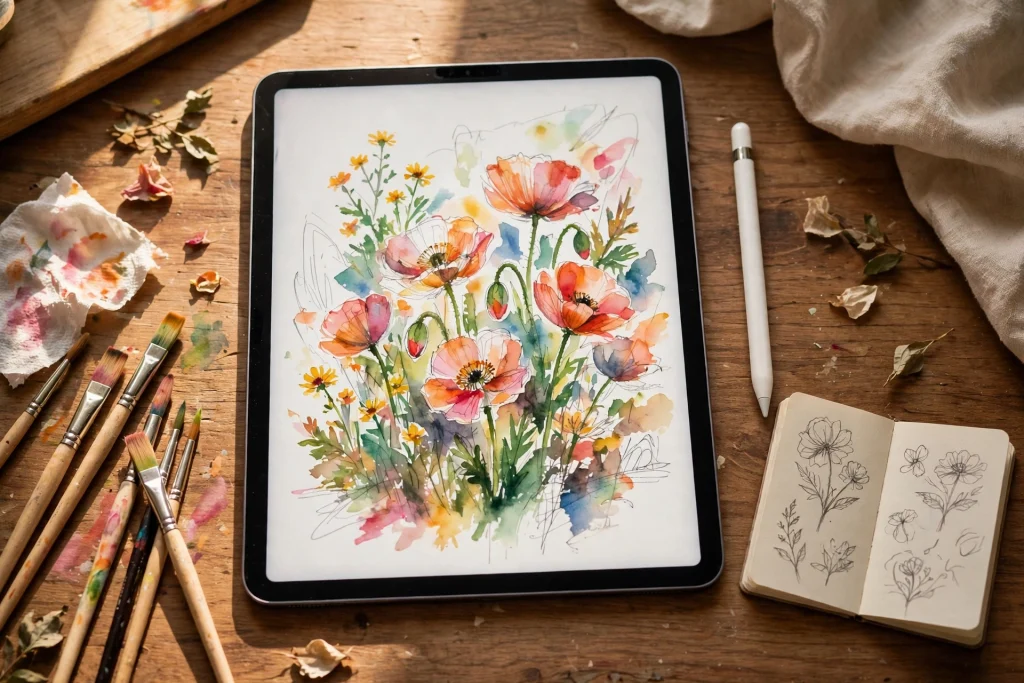
Quick answer
GoodNotes for artists turns your iPad into a portable sketchbook, idea journal and portfolio in one app. Use the brush pen and fountain pen for sketching, save custom colour palettes, keep reference photos beside your drawings, and store reusable motifs as Elements. It will not replace Procreate for finished, layered artwork — but for sketching, planning and presenting your work, it is one of the most flexible tools an artist can carry.
GoodNotes for artists works because art is rarely one finished drawing. It is dozens of thumbnails, colour tests, reference photos, half-finished studies and notes to yourself — and GoodNotes keeps all of that in one searchable, portable place. If you have ever lost a sketchbook, filled a bag with loose paper, or wished you could carry your whole portfolio to a client meeting, this guide shows you how to set GoodNotes up as a working artist’s studio.
Why artists are switching to GoodNotes
Most drawing apps are built for finishing artwork. GoodNotes is built for thinking on paper, and that is where most art actually happens. A sketchbook is where you test an idea before committing to canvas, and GoodNotes behaves like a sketchbook that never runs out of pages, never gets lost, and lets you undo a bad line.
The practical wins are hard to ignore. Your entire sketchbook library fits on one iPad. You can search your handwritten notes — a scribbled “try ultramarine here” from March is findable in September. You can duplicate a page and try three versions of the same composition without redrawing it. And when a client asks to see your work, your portfolio is already in your bag.
None of this means abandoning paper or Procreate. Many artists use GoodNotes as the middle of their workflow: paper for loose warm-ups, GoodNotes for studies and planning, Procreate or canvas for finished pieces. The app earns its place by being the most flexible stage of that process.
What you need to start
You do not need expensive gear to begin. An iPad, an Apple Pencil (or any compatible stylus) and GoodNotes 6 are enough. The free tier of GoodNotes gives you three notebooks, which is plenty for a trial sketchbook. If you plan to keep several sketchbooks running at once, the paid plans remove the limit.
A matte screen protector helps a lot. It adds paper-like friction, so the Pencil does not skate across smooth glass, and it reduces glare when you work outdoors. It is the single cheapest upgrade that changes how drawing in GoodNotes feels.
Choose your paper before you start sketching. GoodNotes ships with blank, lined, grid and dotted templates, and you can import your own PDF pages. For most artists, dotted paper is the sweet spot: the dots guide proportions without showing up in an exported image the way grid lines do. Blank paper suits loose gestural work, while grid paper is ideal for perspective studies and lettering practice.
Step 1: Set up your artist sketchbook
Start with one notebook and give it a clear job. A single “Sketchbook” notebook with sections works better than five half-used notebooks. Create it, then add the structure before you draw anything.
First, build a cover page. Write the notebook’s name, the date range and the project it belongs to. It sounds trivial, but six months later you will be glad you can tell your sketchbooks apart at a glance.
Next, add a contents page with hyperlinks to your sections. GoodNotes lets you link text and shapes to pages, so a tap on “Colour studies” jumps straight there. A simple setup is: thumbnails, studies, colour tests, references, portfolio pieces.
Then add your first pages: two blank pages for warm-ups, one dotted page for thumbnails, and one page reserved as a colour swatch sheet. You can duplicate these pages any time you need more, so the setup takes five minutes and lasts for months.
If you are new to the app itself, our beginner’s guide to using a digital planner in GoodNotes covers the import and navigation basics this guide builds on.
Step 2: Learn the three pens that matter
GoodNotes gives you several pen tools, but three do almost all the artistic work.
The brush pen is your sketching workhorse. It responds to pressure, so a light touch gives a hairline and a firm press gives a bold stroke. Use it for gesture drawings, contour studies and loose thumbnails. Set the stroke size small for detail work and large for blocking in shapes.
The fountain pen gives a consistent, calligraphic line with subtle width variation. It is excellent for ink-style illustration, lettering practice and clean linework over a pencil underdrawing. Pair it with the zoom window when you need neat, controlled lines.
The ballpoint pen is the honest workhorse: predictable, even, and perfect for hatching, cross-hatching and written notes beside your drawings. Because it does not vary with pressure, it is the best choice for shading studies where you want the tone to come from line density, not line weight.
Experiment with each pen at three sizes before you settle on favourites. Write the settings on a test page — “brush 0.6mm for thumbnails, fountain 0.4mm for linework” — so you can return to them without guessing.
Step 3: Build custom colour palettes
GoodNotes lets you save custom colours, and a small, deliberate palette beats a rainbow every time. Pick the colours you actually use: two or three for sketching, a handful for colour studies, and one accent colour for annotations.
A good starter palette for sketching is: a warm dark grey for linework, a mid-blue for underdrawings, a warm red for annotations, and a soft ochre for highlights. The blue underdrawing trick is borrowed from traditional animators: sketch loosely in blue, then draw the clean linework over it in dark grey. The blue reads as “draft” and the dark line reads as “final”, even on the same page.
For colour studies, make a swatch page. Draw a row of squares, fill each with a colour, and label it with the colour’s name or hex value. When you are planning a painting, duplicate the swatch page and test combinations before touching the real piece. It is faster than mixing paint and you can try ten palettes in ten minutes.
Save the colours you use most as presets so they are one tap away. Rebuilding a palette from memory every session is a small friction that adds up, and it is the kind of friction that quietly stops people sketching.
Step 4: Use reference photos properly
GoodNotes lets you import photos directly onto a page, and reference photos are where digital sketchbooks pull ahead of paper. Photograph your subject, import it, and sketch beside it — or trace over a faded copy to learn its proportions.
To study a photo, import it and reduce its opacity by drawing over a light wash, or shrink it into a corner of the page and draw your study next to it. Keeping the reference and the study on the same page means you can compare them instantly, and months later you can see exactly what you were looking at.
For composition planning, import a photo of your canvas or wall space, then sketch framing ideas directly over it. This is how many artists plan gallery hangs and mural layouts: the photo gives the real proportions, and the sketch tests the idea without moving a single frame.
Organise references into a dedicated section rather than scattering them through your sketches. A “References” section with one photo per page, labelled with the date and source, becomes a personal image library you can search and reuse.
Step 5: Save reusable motifs with Elements
Elements is GoodNotes’ tool for saving anything you draw or import so you can stamp it onto any page later. For artists, it is the closest thing to a personal stamp collection.
Draw a motif once — a leaf, a border, a face in three-quarter view, your signature — lasso it, and save it as an Element. From then on, you can place it on any page in seconds. This is invaluable for repeated subjects: pattern designers reuse motifs constantly, illustrators reuse character faces, and lettering artists reuse flourishes.
Build themed Element collections: one for botanical shapes, one for frames and borders, one for textures and hatching patterns. A small library of twenty well-chosen Elements saves more time than a hundred you never use, so curate ruthlessly.
The lasso tool is the key to all of this. If you have not used it yet, our guide to the GoodNotes lasso tool shows how to select, move, resize and convert your drawings — the exact skills Elements depend on.
Step 6: Plan a painting before you start it
The most expensive mistake in painting is starting on canvas before the composition is settled. GoodNotes is the cheap place to make those mistakes.
Start with thumbnails: six small rectangles on one page, each a different composition for the same subject. Spend two minutes on each. The point is not a pretty drawing but a quick test of where the big shapes sit. Most artists find the winner is obvious within seconds of seeing all six together.
Take the winning thumbnail and draw it larger on the next page, adding the value structure: where is the darkest dark, where is the lightest light? Shade with the ballpoint pen using hatching, and check the balance by squinting at the page. If the values work small, they will work large.
Then test colour on a duplicate of that page. Try a warm palette on one copy and a cool palette on another, and compare them side by side. GoodNotes lets you duplicate pages in seconds, so testing three colour schemes costs less time than mixing one palette on a real palette.
When the plan is settled, export the study as an image and keep it beside your easel on your phone, or print it and pin it to the wall. The plan stays visible while you paint, which is exactly when you need it.
Step 7: Turn your sketchbook into a portfolio
A portfolio in GoodNotes is simply a notebook with a job: to show your best work, in the right order, to a specific audience. Build one notebook per audience — one for clients, one for galleries, one for social media — and curate each one differently.
Pick ten to fifteen pieces that represent what you want to be hired for, not everything you have ever made. Put the strongest piece first and the second-strongest last; people remember openings and endings. Add a short title, the medium, the size and the year under each piece, handwritten or typed.
Use full-page images for finished work and leave generous white space around them. A crowded portfolio page looks like a sketchbook; a single piece on a clean page looks like a gallery wall. Export finished pages as images when you need to send them, or present the notebook directly on your iPad — tapping through pages in person feels more personal than a PDF attachment.
Update the portfolio monthly. Remove anything that no longer represents your best work, and add new pieces as they are finished. A portfolio that never changes is a portfolio that quietly goes out of date, and GoodNotes makes updates so easy there is no excuse to let it drift.
A tabbed notebook works well as the base for an artist’s portfolio, because its tabbed sections keep sketchbook, studies and finished work separated but always one tap apart.
GoodNotes vs Procreate: when to use which
Artists often ask whether GoodNotes can replace Procreate. The honest answer is no — and it does not need to. They solve different problems.
| GoodNotes | Procreate | |
|---|---|---|
| Best for | Sketching, planning, notes, portfolios | Finished, layered digital paintings |
| Layers | No true layers (duplicate pages instead) | Full layer system with blending modes |
| Brushes | Pen, fountain, brush, highlighter | Hundreds of customisable brushes |
| Handwriting search | Yes — search notes and annotations | No |
| PDF and documents | Native — import, annotate, export | Import only, limited annotation |
| Price | Free tier; paid plans from $11.99/year | One-time purchase |
Use GoodNotes for the thinking stage: thumbnails, studies, colour tests, reference boards and portfolios. Use Procreate for the finishing stage: layered paintings, textured brushes and print-ready exports. Many artists sketch in GoodNotes, export the study, and finish it in Procreate — the two apps complement each other rather than competing.
The layers limitation deserves a direct answer. GoodNotes has no true layers, so you cannot paint on a separate layer and erase it independently. The workaround is to duplicate the page before each risky step: one page for the underdrawing, a duplicate for the linework, another for colour. It is less elegant than layers, but it is reliable, and it forces the useful habit of saving a version before every bold decision.
Common mistakes to avoid
Treating it like paper. The point of a digital sketchbook is the digital part: duplicate pages, undo freely, search your notes, rearrange with the lasso. If you use GoodNotes exactly like a paper sketchbook, you get the worst of both worlds.
One giant notebook for everything. A 600-page notebook gets slow — GoodNotes itself notes that very large notebooks can perform poorly — and it becomes unsearchable in practice. Split by project or by quarter, and keep each notebook focused.
No backup. Turn on iCloud sync and auto-backup, and check occasionally that it is actually working. A sketchbook is irreplaceable in a way a planner is not; losing a year’s drawings to a failed sync is a preventable heartbreak. Our guide to backing up your GoodNotes planner covers the same settings your sketchbook needs.
Skipping the zoom window. Fine detail on a full page is hard without it. The zoom window magnifies one line while you write, so small, neat work stays readable. Our guide to the GoodNotes zoom window shows how to use it for detailed drawing as well as handwriting.
A simple 30-day sketching routine
If you want GoodNotes to become a daily habit rather than an app you open twice, give it a small, fixed routine. Ten minutes a day beats a three-hour session once a month, because the habit is what builds skill.
- Warm up (2 minutes): fill half a page with loose lines, circles and gesture marks. No subject, no pressure.
- One study (5 minutes): draw one thing in front of you — a cup, a plant, your hand. One subject, one page.
- One note (1 minute): write what worked and what did not, in one sentence.
- One colour test (2 minutes): try one new colour combination on your swatch page.
- Weekly review (10 minutes, Sundays): flip through the week’s pages, lasso the best study into your portfolio notebook, and delete nothing — even bad drawings teach you something.
After thirty days you will have thirty studies, a tested colour palette, and a visible record of improvement. That record is the real reward, and it is the reason a searchable digital sketchbook beats a stack of paper ones.
Frequently asked questions
Is GoodNotes good for drawing?
Yes, for sketching, studies, planning and portfolios. The brush pen and fountain pen with Apple Pencil pressure sensitivity are genuinely good for drawing, and features like the zoom window, lasso tool and Elements add real value. For finished, layered digital paintings, a dedicated app like Procreate is the better tool.
Can I use GoodNotes as a sketchbook?
Yes. Create a notebook with dotted or blank paper, add sections for thumbnails, studies, colour tests and references, and use the brush pen for sketching. Keep notebooks focused by project or quarter so they stay fast and searchable.
Does GoodNotes have layers?
No, GoodNotes does not have true layers. The standard workaround is to duplicate a page before each major step — one page for the underdrawing, a duplicate for linework, another for colour — so you always have a version to fall back to.
Can I sell art made in GoodNotes?
Yes. Export your pages as images or PDF and sell prints, or use your GoodNotes portfolio to win commissions. Export at the highest quality available and check the result on a larger screen before printing, since screen colours can differ from print.
What iPad and stylus do I need?
Any iPad that runs GoodNotes 6 with an Apple Pencil or compatible stylus works. A matte screen protector is the most useful accessory, because it adds paper-like friction and cuts glare. You do not need the most expensive iPad to sketch well in GoodNotes.
Start your artist sketchbook today
GoodNotes for artists is not about replacing your favourite tools. It is about giving your ideas a home that travels with you, stays searchable, and never runs out of pages. Set up one notebook, draw one study, and save one colour palette — that is enough to start. The habit builds from there.
Ready to set up your studio? Start with a tabbed notebook for your sketchbook and studies, or explore the 2027 Life Planner to keep your art goals, deadlines and exhibitions organised alongside your work.
Temply Studio
Stop chasing your goals with sticky notes and scattered notebooks. Our premium digital planners and Canva templates are designed to help you plan with intention, stay consistent, and actually enjoy the process.
Questions about this guide?
Ask about the planner, share how you use it, or tell us what to cover next. Your email stays private.