

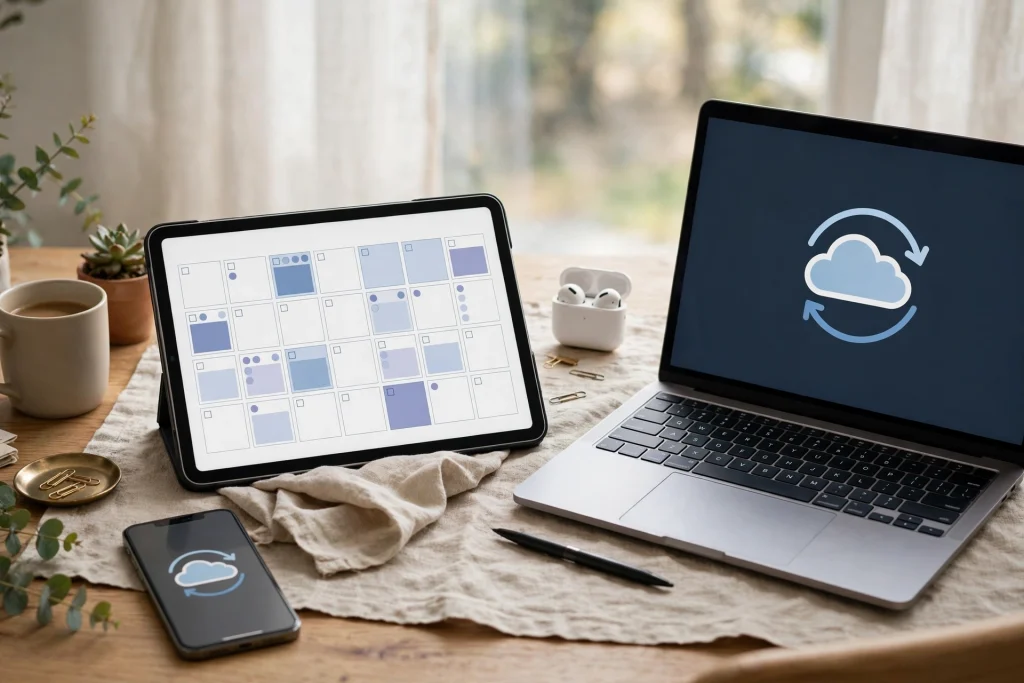
Quick answer: To back up your GoodNotes planner properly, turn on BOTH iCloud sync and auto-backup. iCloud sync keeps your library identical across your Apple devices and lets you edit anywhere; auto-backup (Google Drive, Dropbox, or OneDrive) keeps a one-way safety copy that also protects you if iCloud itself has a problem. Add a manual backup before any big change, and you are covered against a lost iPad, a failed sync, and an accidental deletion.
Learning how to back up your GoodNotes planner is the single most valuable ten minutes you will spend on digital planning. A planner holds a year of your life — appointments, goals, habits, journals, budgets — and unlike a paper planner, it can vanish in one bad sync or one lost device. The good news: GoodNotes gives you three layers of protection, and once you understand what each one actually does, setting them all up takes less time than choosing a new planner cover.
The Distinction Most People Get Wrong: Sync vs Backup
The confusion that causes most data loss is simple: people think iCloud sync is a backup. It is not — at least, not a complete one. Here is the difference that matters.
- iCloud sync is two-way. It keeps your GoodNotes library the same on your iPhone, iPad, and Mac, and you can edit your planner on any of them. It protects you if you lose a device, because your library lives in iCloud and returns when you sign in on a new device. But because it syncs deletions too, a mistake can propagate everywhere.
- Auto-backup is one-way. GoodNotes periodically copies your library to Google Drive, Dropbox, or OneDrive. You cannot edit that copy in place — it is a safety copy only. That one-way design is its strength: it protects you against device loss AND against iCloud problems, because the copy sits in a completely separate service.
- Manual backup is your on-demand snapshot. You trigger it yourself before risky moments — updating iPadOS, restructuring a planner, or trying the export-and-reimport fix for a GoodNotes planner that is slow or lagging.
The best protection is both iCloud sync and auto-backup turned on. They cover different failure modes, they cost nothing extra beyond storage you probably already have, and together they mean no single service failure can take your planner away.
Step 1: Turn On iCloud Sync
On your iPad, open Settings, tap your Apple ID at the top, tap iCloud, and make sure GoodNotes is switched on. Inside GoodNotes, confirm that iCloud sync is enabled for your library. From then on, your planner syncs automatically between your Apple devices whenever you have an internet connection.
Before you rely on it, verify it is actually working. On your iPhone or iPad, go to Settings > Apple ID > iCloud > Manage Account Storage and look for GoodNotes in the list. It should show a plausible size — typically a few hundred megabytes to a few gigabytes for an active planner library. If GoodNotes is missing from that list, or the size looks impossibly small, sync is not running, and you should sign out and back into iCloud or check that you have free iCloud storage before going further.
Step 2: Turn On Auto-Backup
In GoodNotes, open the settings menu and go to Cloud & Backup, then Auto-Backup. Choose Google Drive, Dropbox, or OneDrive, sign in, and pick a backup format. GoodNotes can back up in its own editable format or as PDF. The editable format is the better safety copy: you can import it back into GoodNotes later as a fully working notebook, while a PDF backup preserves the pages but flattens your handwriting into images.
Auto-backup runs in the background, but it needs two things to succeed: Wi-Fi and time with GoodNotes open. If a backup looks stale, leave GoodNotes open on Wi-Fi for a few minutes and check again. Large libraries can take a while on the first run, and that is normal.
Step 3: Make a Manual Backup Before Big Changes
Whenever you are about to do something irreversible — deleting a section, restructuring a planner, updating iPadOS, or rebuilding a lagging file — make a manual backup first. In GoodNotes, go to Menu > Cloud & Backup > Manual Backup > Back Up Now. GoodNotes saves your library as a .zip file.
One detail catches people out: GoodNotes must stay open in the foreground until the backup finishes. If you switch away or close the app, the backup restarts. Start it when you have a few uninterrupted minutes, wait for the confirmation, and only then carry on with your change. To restore from a manual backup later, import the .zip file back into GoodNotes.
How to Restore Your Planner
Restoring depends on which safety net you are using, so keep this section bookmarked for the day you actually need it.
New or lost device with iCloud sync
Sign in with the same Apple ID on the new device, install GoodNotes, and make sure iCloud sync is on. Your library downloads automatically. If it does not appear, check the iCloud storage screen described in Step 1 first — it tells you in seconds whether your library is actually in iCloud.
From an auto-backup
In GoodNotes, tap the + New button, choose Import, and browse to your Google Drive, Dropbox, or OneDrive folder. Select the .goodnotes file to restore a fully editable notebook, or a PDF if that is the format you chose. One known GoodNotes quirk to know about in advance: there is no direct “restore from auto-backup” button in the app. Importing the backup file manually is the supported path, and it works — but if you want a genuinely one-tap restore, the manual-backup .zip is the better tool for that job.
From a manual backup
Import the .zip file into GoodNotes. This restores your whole library as it was at the moment you made the backup, which is exactly why manual backups matter before big changes: they are a snapshot you can roll back to, not just a synced copy of the current state.
Troubleshooting: When Backup Does Not Work
Backup is not updating
Leave GoodNotes open on Wi-Fi for a few minutes, then check again. If it is still stale, sign out of the auto-backup service inside GoodNotes and sign back in. Re-authentication fixes most stalled backups.
Google sign-in fails
Sign out and sign in again. If you are using a work or school Google account, it may block third-party app access entirely — in that case, switch auto-backup to a personal Google account, Dropbox, or OneDrive instead.
Drive storage is full
Free up space in the backup service, or switch the backup format to PDF for text-heavy notebooks — PDF backups are considerably smaller. Either way, confirm the next backup completes before you delete anything old.
Duplicate backup folders appear
Changing backup format or service can leave an old backup folder behind. Do not delete the old folder until you have confirmed the new backup is complete and restorable. Two complete backups are not a problem; zero complete backups are.
A Simple Backup Routine That Actually Holds
You do not need a complicated system. Turn on iCloud sync once, turn on auto-backup once, and make a manual backup on the first of each month and before any big change. That routine takes under a minute a month and covers every realistic failure: lost device, failed sync, bad update, and accidental deletion. If you are setting up a fresh planner for the new quarter, pair this routine with a planner built to stay manageable — our 2027 Life Planner keeps daily, weekly, and monthly sections in one tidy file, and our how to use a digital planner in GoodNotes guide walks through the full setup. And if your planner’s hyperlinks ever stop responding, our guide to GoodNotes hyperlinks not working covers that fix too.
FAQ: Backing Up Your GoodNotes Planner
Does GoodNotes back up automatically?
Only if you turn it on. iCloud sync keeps your library synced across Apple devices, and auto-backup copies it to Google Drive, Dropbox, or OneDrive. Neither is enabled by default in a way you should assume — check both settings today using the steps above.
How do I restore my GoodNotes library on a new iPad?
Sign in with the same Apple ID, enable iCloud sync in GoodNotes, and your library downloads. If you used auto-backup instead, import the .goodnotes file from Drive, Dropbox, or OneDrive via + New > Import. If you made a manual backup, import its .zip file.
iCloud sync vs automatic backup — what is the difference?
iCloud sync is two-way and editable everywhere; auto-backup is a one-way safety copy in a separate service. Sync protects against device loss; backup protects against device loss and iCloud problems. Use both.
Is my planner safe if I lose my iPad?
Yes, if either iCloud sync or auto-backup was on before you lost it. Your library lives in iCloud or in your backup service, not only on the device. That is the whole point of setting both up now, while your iPad is sitting safely in front of you.
Do it now, while you are thinking about it: open GoodNotes, check iCloud sync and auto-backup, and make one manual backup. Then explore the 2027 Life Planner for a fresh, well-organized start to your next quarter.
For GoodNotes’ own backup and sync guidance, see GoodNotes.
Temply Studio
Stop chasing your goals with sticky notes and scattered notebooks. Our premium digital planners and Canva templates are designed to help you plan with intention, stay consistent, and actually enjoy the process.
Questions about this guide?
Ask about the planner, share how you use it, or tell us what to cover next. Your email stays private.