

GoodNotes Wedding Planner: Checklists, Budgets & Vendor Notes in One Place
Quick answer: A GoodNotes wedding planner keeps your checklists, budget, guest list, vendor notes, seating plan and day-of timeline in one searchable digital notebook. Set up a dedicated notebook, add monthly checklists, a budget tracker, vendor comparison pages and a seating plan, then share selected pages with your partner or planner so everyone works from the same plan.
Planning a wedding means keeping track of dozens of moving parts at once: venues, vendors, guest lists, budgets, outfits, timelines and a hundred small decisions that all feel urgent. A GoodNotes wedding planner brings that chaos into one place. Instead of scattered notes, screenshots, spreadsheets and paper lists, you get a single notebook you can carry on your iPad, search in seconds and update whenever an idea strikes.
The real advantage is not just tidiness. When your budget, guest list and vendor notes live together, you can see how decisions connect. Changing the guest count changes the catering estimate. Choosing a venue changes the timeline. A digital planner makes those knock-on effects visible before they become expensive surprises, and it keeps the whole plan with you at venue visits, tastings and fittings.
This guide walks through a complete setup: a twelve-month timeline, a guest list that stays accurate, a budget tracker you will actually use, a vendor comparison system, a seating plan you can rearrange without starting over, and a day-of checklist that keeps the morning calm. Whether you are planning a large celebration or a small, intimate wedding, the same structure works — you simply scale each section to fit.
Why Use GoodNotes for Wedding Planning?
GoodNotes is well suited to wedding planning because it combines handwriting, typing, images and PDF templates in one notebook. You can sketch a table layout by hand, paste in a photo of a venue, type up a vendor quote and annotate a contract summary, all on pages that stay in order. Search makes it easy to find a note months later, even if you cannot remember which section you wrote it in.
Another benefit is flexibility. Paper planners are beautiful, but they cannot be rearranged. In GoodNotes, you can duplicate a page, move sections around, add extra pages for a vendor that needs more notes, and delete a page you no longer need. If your wedding grows from fifty guests to one hundred and fifty, your planner grows with it instead of running out of space.
Digital planning also makes sharing easier. You can export a single page as a PDF for your partner, your planner or a family member, without handing over your entire notebook. That matters when you want input on the seating plan but do not need everyone to see the full budget. Sharing the right page, rather than the whole plan, keeps decisions focused and private details private.
Finally, a digital notebook is always with you. Venue tours, dress fittings, cake tastings and family dinners are exactly the moments when new ideas and decisions appear. If your planner lives on your iPad or phone, you can capture them immediately instead of relying on memory or a note that gets lost before you get home.
Set Up Your GoodNotes Wedding Planner in 6 Steps
Before you fill in any details, set up the structure. A clear structure saves far more time than it takes to create, because it stops your notes from drifting into one long, unsearchable list. Follow these steps in order, and resist the urge to perfect each page before moving on — you can refine everything as decisions become real.
- Create a dedicated wedding notebook. Give it a clear name, such as your wedding date or your names, and choose a cover you will enjoy opening. Keep wedding planning separate from work notes, journals and other planners so nothing gets buried.
- Add a contents page with hyperlinks. List every section — timeline, guest list, budget, vendors, seating plan, day-of checklist — and link each entry to its page. A linked contents page turns a long notebook into a planner you can navigate in two taps.
- Build the twelve-month timeline first. Add one checklist page per month or quarter, working backwards from your wedding date. This becomes your master to-do list and the page you check most often.
- Set up the guest list and budget together. These two sections feed each other: guest numbers drive catering, seating, invitations and favours. Keep them side by side so you can update both in the same planning session.
- Create one vendor page per supplier. Use the same layout for every vendor — contact details, quote, what is included, what is not, payment schedule and questions to ask. Consistent pages make comparisons honest and fast.
- Leave blank pages at the end of each section. Weddings generate unexpected notes: a song request, a family tradition, a backup plan for rain. Blank pages give those notes a home instead of letting them pile up at the back of the notebook.
Once the structure is in place, planning becomes a habit rather than a project. Open the notebook once a week, check the current month’s checklist, update the budget, and note anything new. Small, regular updates beat marathon planning sessions every time.
The 12-Month Wedding Timeline
A twelve-month timeline works well for most weddings, but the exact order matters less than having deadlines you can see. If your engagement is shorter, compress the early months and focus on venue, vendors and guest list first — those three decisions unlock almost everything else. If you have more than a year, spread the early research out and use the extra time to compare options properly.
12 to 9 Months Before: The Big Decisions
This is the foundation stage. Choose your wedding date and venue, agree on a realistic overall budget, and start your guest list. Research photographers, caterers and musicians early, because the best vendors book far ahead, especially for popular dates and seasons. This is also the right time to decide on the overall style of the day — formal or relaxed, large or intimate, traditional or modern — because that style guides every later choice.
Use your timeline checklist to record decisions, not just tasks. Next to each completed item, note the date, the cost and the contact person. Months later, when you need to confirm a detail, you will be grateful for a short, factual record instead of a vague memory of a conversation.
9 to 6 Months Before: Bookings and Details
With the venue secured, book your main vendors: photographer, videographer, caterer, florist, music and officiant. Order or choose outfits, start dress or suit fittings, and send save-the-dates if you are using them. Begin planning the ceremony and reception flow — the order of events, speeches, music and any readings or traditions you want to include.
This is also a good time to plan the guest experience. Think about transport, accommodation for out-of-town guests, dietary requirements and accessibility. Notes on these details, kept beside the guest list, prevent last-minute scrambles and show guests that their comfort was considered.
6 to 3 Months Before: Invitations and Final Choices
Send invitations, track replies carefully, and finalise the menu, cake, flowers and decor. Book hair and makeup trials, confirm transport, and start building the seating plan once replies come in. This stage often feels busy because several threads converge at once — that is exactly why a single planner matters. When everything is visible in one notebook, you can spot clashes, such as a tasting booked on the same day as a fitting, before they happen.
Keep a running list of questions for each vendor during this period. Small questions are easy to forget and annoying to chase later, so write them down the moment they occur to you and bring the list to every meeting or call.
3 Months to the Day: Confirm, Rehearse, Enjoy
In the final months, confirm every vendor in writing, share the day-of timeline, and hold a rehearsal if your ceremony needs one. Finalise the seating plan, print or export place cards, pack an emergency kit, and prepare payments and tips. In the last week, the goal shifts from planning to protecting your energy: confirm, pack, rest, and leave room to actually enjoy the day you have spent so long creating.
Build a Guest List That Stays Accurate
A guest list is more than a list of names. It is the foundation of your budget, seating plan, invitations and catering numbers, so accuracy matters. Start with a single master list, then add columns or notes for each guest: invitation sent, reply received, attending or not, dietary requirements, plus-one status, table assignment and any notes about transport or accommodation.
Agree on the rules early. Decide together who counts as a plus-one, how you will handle children, and what happens if someone asks to bring an extra guest. Writing these rules down — even briefly — prevents awkward, inconsistent decisions later, especially when family members have different expectations. A shared understanding at the start saves difficult conversations near the end.
Track replies as they arrive, not in a weekly batch. A guest list that lags behind reality leads to wrong catering numbers and a seating plan built on guesses. Each time a reply comes in, update the master list immediately, adjust the attending count, and note any dietary or accessibility needs in the same place.
Finally, keep a separate list for people who are part of the day but not guests in the usual sense: vendors, musicians, photographers and anyone else who needs a meal, a seat or a timeline. Forgetting these people is a common and avoidable oversight, and a short separate list solves it completely.
Track Your Wedding Budget Without the Stress
A wedding budget works best when it is visible, honest and updated regularly. Start by listing every category — venue, catering, photography, attire, flowers, music, stationery, transport, cake, decor and a contingency fund — then assign a target to each. The contingency fund matters more than most couples expect: small extras, from postage to alterations, add up quickly, and a buffer keeps them from derailing the whole plan.
Record three figures for each category: the target, the quoted price and the amount actually paid. The gap between target and quote shows where you need to negotiate or adjust; the gap between quote and paid shows what is still owed. Review the budget after every booking, not just at the end of the month, so surprises stay small.
Be specific about what each quote includes. A catering quote that excludes drinks, service charges or cake-cutting fees is not comparable to one that includes them. Note inclusions and exclusions on the vendor page, and carry the comparable total into the budget tracker. This discipline is what turns a budget from a guess into a tool.
For a ready-made structure, a Wedding Budget Planner Spreadsheet can sit alongside your GoodNotes notebook and handle the arithmetic while GoodNotes holds the notes, quotes and decisions behind each number. Use whichever tool feels natural for the numbers, and keep the story of each decision in your planner.
Compare Vendors Side by Side
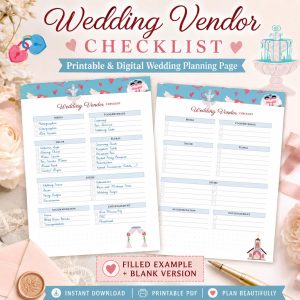
Vendor comparison is where many weddings go over budget or under-deliver, not because couples choose badly, but because they compare unlike with unlike. A consistent vendor page solves this. For each vendor, record the same information in the same order, so a quick glance shows what is actually different between two options.
Include the practical details first: business name, contact person, email and phone number, website or portfolio link, and the date you enquired. Then record the quote, what is included, what costs extra, the payment schedule, the cancellation terms and the deadline for confirming. These details matter far more than a first impression, and they are easy to forget after visiting several venues in one weekend.
Add a short notes section for your impressions: how responsive was the vendor, did they listen, did they suggest ideas you liked, and would you enjoy working with them on a high-pressure day? A vendor you trust and communicate well with is worth more than a slightly cheaper option that leaves you chasing replies.
When you have two or three quotes for the same service, build a simple comparison page: one column per vendor, one row per feature, and a total comparable cost at the bottom. The best choice usually becomes obvious once the numbers and inclusions sit side by side, and you will have a written record of why you chose them if questions arise later.
Design a Seating Plan You Can Rearrange
A seating plan is one of the most satisfying parts of wedding planning — and one of the easiest to overthink. Start with table groupings, not individual seats. Group guests who know each other, share interests or will enjoy each other’s company, and keep family dynamics in mind without trying to solve every relationship on one page.
In GoodNotes, sketch tables as simple shapes and write guest names beside them, or use sticky-note style boxes you can move as the plan evolves. The advantage of a digital plan is that moving one guest does not mean rewriting the whole table. Try a layout, live with it for a few days, and adjust it when replies change the numbers.
Keep a few practical rules in mind. Seat older guests away from speakers, keep children near their parents, and place the head table where the couple can see and be seen. Leave space for service staff to move between tables, and check the venue’s floor plan before finalising numbers — a room that looks large empty can feel very different with tables, a dance floor and a band.
Once the plan is settled, export it as a PDF for the venue and caterer, and keep a copy in your notebook for the day itself. On the day, small changes will happen — a guest moves, a chair is added — and having the plan on your iPad means you can update it on the spot instead of relying on a printed copy that is already out of date.
Your Day-Of Checklist
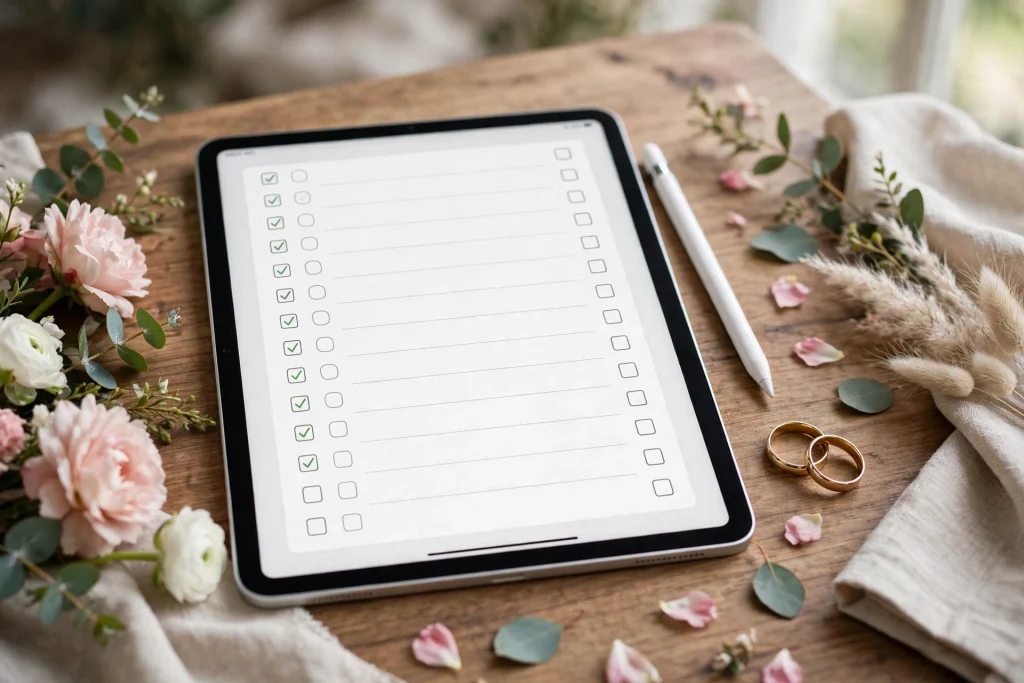
The day-of checklist is the page that turns months of planning into a calm morning. Write it in time order, from waking up to the end of the reception, and assign each task to a named person. A checklist without an owner is just a wish list, and on the wedding day, clarity about who does what is a gift to everyone involved.
Start with personal preparation: hair, makeup, getting dressed, photos with the wedding party, and a moment to eat and drink something before the ceremony. Couples often forget food and water in the excitement, so put them on the checklist explicitly. A calm, fed couple enjoys the day far more than a hungry, rushed one.
Next, list ceremony and reception tasks: venue setup, flowers, music cues, readings, speeches, cake cutting, first dance and send-off. Note the time, the location and the person responsible for each. Share this timeline with vendors and the wedding party a few days before, so nobody needs to ask you questions on the day itself.
Do not forget the small essentials. A Wedding Day Emergency Kit Checklist covers the safety pins, plasters, pain relief, tissues, sewing kit, stain remover and spare buttons that turn a minor mishap into a non-event. Pack the kit the night before, give it to a trusted person, and then stop worrying about it — that is the whole point.
Finally, plan the end of the night: who collects gifts and cards, where personal items go, what happens to leftover flowers and cake, and how you get home. Ending the day with a short, clear list means you can leave the venue relaxed instead of trying to organise logistics in formal wear at midnight.
Sharing Pages With Your Partner and Planner
Sharing is where a digital planner truly earns its place, but it works best with a little structure. Decide what each person needs to see, and share only those pages. Your partner probably needs the budget, timeline and seating plan. Your planner may need the vendor contacts, day-of timeline and floor plan. Family members helping with a specific task may need just one page, such as the guest list or the music list.
Export shared pages as PDFs rather than sharing the whole notebook. PDFs are easy to open, print and annotate, and they keep private sections private. If a page changes, export a fresh copy and note the date, so nobody works from an outdated version. A short message — “updated seating plan, 12 May version” — prevents more confusion than any filing system.
Use a simple feedback loop. When you share a page, say what kind of input you want and by when: “Please check the seating plan and let me know about any clashes by Friday.” Open-ended sharing without a question often produces silence, while a specific question produces useful answers. This is especially helpful for seating plans and music choices, where everyone has opinions but few people volunteer them unprompted.
Keep one master copy. Even if several people annotate shared pages, only one version — yours — is the plan of record. When feedback comes in, update the master notebook yourself and re-export if needed. This avoids the classic problem of three versions of the same plan circulating at once, each slightly different and each claimed as final.
If wedding planning is one part of a busy life, keep the rest of your life organised alongside it. A 2027 Life Planner can hold work, appointments and personal goals separately, so your wedding notebook stays focused on the wedding and your everyday planner stays focused on everything else.
Common Wedding Planning Mistakes to Avoid
The most common mistake is starting with details before decisions. Choosing flowers before the venue, or a playlist before the guest list, creates rework when the big decisions change the context. Follow the timeline order: venue and budget first, vendors second, details last. Details are enjoyable, but they belong after the foundation is set.
Another frequent mistake is underestimating time. Tasks that sound quick — addressing invitations, confirming dietary requirements, writing vows — take longer than expected, especially when they depend on other people’s replies. Build buffer time into every deadline, and start invitation and reply tracking earlier than feels necessary.
Many couples also forget to plan for themselves. The wedding day is long, emotional and physically demanding. Schedule rest, food, water and a few quiet minutes together during the day. These are not luxuries; they are what allow you to be present instead of exhausted by the time the celebration peaks.
Finally, avoid keeping decisions only in your head or in chat messages. If a vendor confirms something important by message, copy the key facts into your planner the same day. Chat threads are searchable in theory and chaotic in practice, while a planner page is designed to be found again.
Frequently Asked Questions
Can I plan my whole wedding in GoodNotes?
Yes, for most couples GoodNotes can hold the entire plan: timelines, checklists, guest lists, budgets, vendor notes, seating plans and day-of timelines. Pair it with a spreadsheet for heavy budget arithmetic if you prefer, but the notes, decisions and documents behind the numbers fit naturally in a GoodNotes notebook. The key is a clear structure and a weekly habit of updating it.
How do I share my wedding planner with my partner?
Export the pages your partner needs as PDFs and share those, rather than the whole notebook. Share the budget, timeline and seating plan for joint decisions, and keep private notes separate. When a page changes, export a fresh copy with the date noted, and ask for feedback on a specific question by a specific date so decisions keep moving.
When should I start my wedding seating plan?
Start grouping guests once invitations go out, and finalise individual seats after most replies are in — usually four to six weeks before the wedding. Starting earlier helps you spot problems, such as a table that is too large or a group that does not mix well, while leaving the final version until replies settle avoids constant rewriting.
What should be in a wedding day emergency kit?
A good kit covers minor mishaps: safety pins, a small sewing kit, plasters, pain relief, tissues, stain remover, spare buttons, hair pins, breath mints and a phone charger. Pack it the night before and give it to a trusted member of the wedding party. The goal is not to expect problems, but to make any small problem disappear in under a minute.
Wedding planning will still have busy weeks and unexpected changes — no planner removes those entirely. But a well-organised GoodNotes wedding planner means those weeks are manageable rather than overwhelming, because every decision, deadline and detail has a place, and you always know where to look next. Start with the structure, update it weekly, and let the planner carry the details so you can enjoy the celebration itself.
Ready to get organised? Start with your budget — the decision that shapes everything else — with the Wedding Budget Planner Spreadsheet, and build your checklists, vendor notes and seating plan around it in GoodNotes.
Temply Studio
Stop chasing your goals with sticky notes and scattered notebooks. Our premium digital planners and Canva templates are designed to help you plan with intention, stay consistent, and actually enjoy the process.
Questions about this guide?
Ask about the planner, share how you use it, or tell us what to cover next. Your email stays private.