

Quick answer
GoodNotes for home renovation keeps your budgets, timelines, mood boards and contractor notes in one place on your iPad. Build a notebook per room, track every cost against your budget, collect inspiration images on mood board pages, and export shareable PDFs for your contractor or partner. It replaces the folder of quotes, the paint samples in a drawer, and the budget spreadsheet nobody opens.
A home renovation generates paper faster than almost any other project: quotes from three contractors, paint swatches, tile samples, delivery notes, measurements scribbled on the back of envelopes, and a budget that drifts a little every week. GoodNotes for home renovation gives all of it one home, so you can answer the two questions that matter at any moment — how much have we spent, and what happens next? — without digging through a drawer.
Why plan a renovation in GoodNotes
Renovations fail on organisation more often than on craftsmanship. The work itself is usually fine; the problems come from a forgotten measurement, a quote that was never compared, a paint colour ordered in the wrong finish, or a budget that nobody tracked until it was too late.
GoodNotes helps because it is visual and portable in exactly the ways a renovation needs. You can photograph a wall, sketch the new layout over the photo, and show it to your contractor on the spot. You can keep a mood board on the same page as the budget for that room, so inspiration and cost stay connected. And you can carry the whole project to the tile shop, the paint store and the site meeting without a folder.
It also keeps a household aligned. When two people are making decisions together, a shared notebook — synced through iCloud — means both of you see the same budget, the same shortlist and the same timeline. Fewer “I thought we agreed on the other tiles” conversations, and a written record when memories differ.
What you need to start
An iPad, an Apple Pencil or compatible stylus, and GoodNotes 6 are enough. A larger iPad helps for mood boards and floor plans, but any iPad works if you use landscape orientation for wide pages.
Before you build anything, gather what you already have: existing quotes, measurements, photos of each room, paint and material samples, and your overall budget. Import the quotes as PDFs, photograph the samples, and measure each room — even rough measurements are better than none, because every later decision depends on them.
Set your budget in writing before the first purchase. Write the total, then split it by room and by category (labour, materials, fixtures, contingency). A 10–15% contingency line is not pessimism; it is the standard allowance for the surprises every renovation produces, from a damp wall to a discontinued tile.
Step 1: Build one notebook per project
Start with one notebook for the whole renovation, organised by room. Create a cover page with the project name, the address, the start date and the total budget — it sounds formal, but it turns a loose collection of notes into a project file you can hand to anyone.
Next, build an index page with hyperlinks to each section: Overview, Budget, Timeline, then one section per room (Kitchen, Bathroom, Living Room, and so on), then Suppliers and Contacts. GoodNotes lets you link text and shapes to pages, so a tap on “Kitchen” jumps straight to the kitchen pages. If you have not used links before, our guide to linking pages in GoodNotes 6 shows how.
Inside each room section, use the same page order every time: mood board, floor plan sketch, measurements, materials shortlist, budget, and decisions log. The consistent structure means you always know where to find the tile choice for the bathroom or the paint code for the bedroom, without hunting.
If you are new to the app, our beginner’s guide to using a digital planner in GoodNotes covers the import and navigation basics this guide builds on.
Step 2: Make a budget tracker that stays honest
A renovation budget only works if it is updated the same day money is spent. The longer the gap between spending and recording, the more the numbers drift — and drift is how a project goes 20% over budget before anyone notices.
Build a budget page per room with four columns: item, estimated cost, actual cost, and difference. Fill in the estimate before you buy, and the actual cost the day you pay. The difference column is the early-warning system: if the bathroom tiles cost 300 more than estimated, you see it while there is still time to save elsewhere, not at the end of the project.
Keep a separate contingency page that tracks the 10–15% reserve. Every surprise — the extra plastering, the replacement pipe, the delivery fee nobody mentioned — comes out of contingency, and you write it down the same day. When contingency drops below 5% of the remaining budget, that is the signal to pause optional spending until the essentials are covered.
A 2027 Finance Planner works well as the budget base for a renovation, because its monthly and category pages are already built for tracking planned versus actual spending — and the same file can keep your household budget running alongside the project.
Step 3: Build mood boards that actually decide things
A mood board is not a Pinterest collection. It is a decision tool: a single page that shows what a room will look and feel like, so you can choose materials with confidence instead of guessing in a shop.
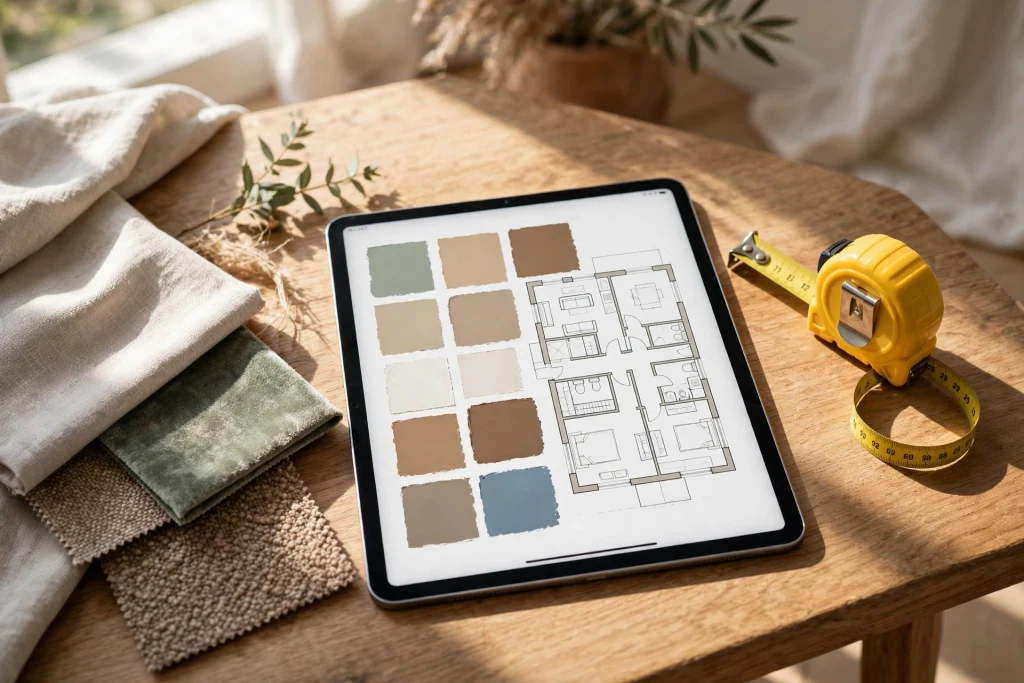
Start each room’s mood board with three to five images: the overall style, the main material, the accent colour, and one detail you love. Import photos from your camera roll, screenshots from supplier websites, or photos of physical samples. Arrange them on one page, add short labels (“warm oak floor”, “matte sage tiles”), and leave white space — a crowded board decides nothing.
Beside each image, write the practical facts: the supplier, the product name or code, the price per square metre or per unit, and the lead time. Inspiration without prices is how a mood board becomes a fantasy; inspiration with prices is how it becomes a shopping list.
When a decision is made, mark it clearly on the board — a green tick and the date, or the words “DECIDED” beside the chosen option. Cross out the rejected alternatives rather than deleting them, so you can see what you considered and why. Six weeks later, when someone asks “why didn’t we pick the darker tiles?”, the crossed-out option with its price beside it answers the question.
Step 4: Sketch floor plans over real photos
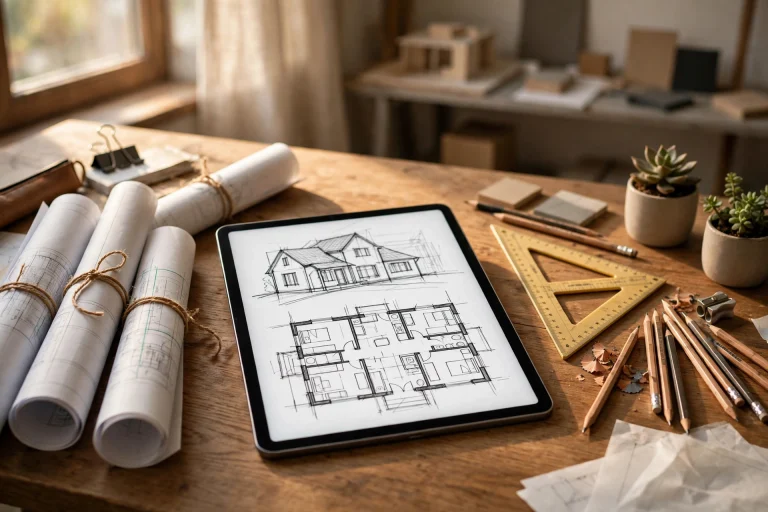
You do not need CAD software to plan a room. Photograph each wall, import the photo into GoodNotes, and sketch the new layout directly over it. The photo gives you the true proportions; the sketch tests the idea.
For a more accurate plan, measure the room and draw a simple scale plan on grid paper: one square equals 10 or 20 centimetres. Mark doors, windows, radiators and power points, because those fixed points decide where furniture and fixtures can actually go. Then draw the new layout — the kitchen units, the bath, the wardrobe — to the same scale, and check that doors still open and walkways are wide enough.
Use the lasso tool to move furniture shapes around the plan instead of redrawing them. Draw a sofa once, save it as an Element, and stamp it in different positions to test layouts in seconds. Our guide to the GoodNotes lasso tool covers the selection and moving skills this depends on.
Keep a before-and-after pair for every room: a photo of the room as it is, and the sketch of what it will become. The pair is useful for the contractor, motivating for you on the hard days, and satisfying to look back on when the work is done.
Step 5: Track the timeline week by week
Renovation timelines slip. Materials arrive late, a trade is delayed, a wall hides a surprise. A timeline page that you update weekly keeps the slip visible and manageable, instead of discovering at the end that the project is a month behind.
Build a simple timeline table: task, who is responsible, planned start, planned finish, actual finish, and status. List the tasks in dependency order — demolition before plastering, plastering before painting, painting before flooring — because the order is what makes a timeline realistic.
Review it every week, ideally at the same time as your budget update. Mark completed tasks, move slipped ones, and write one line about the coming week’s priority. If a task slips by more than a week, ask the contractor what the knock-on effect is, and write the answer down. Verbal promises about timelines are forgotten; written ones are not.
Use the 2027 Life Planner to keep the renovation timeline visible alongside your normal life — site meetings, delivery days and decision deadlines sit in the same calendar as everything else, so nothing gets double-booked.
Step 6: Manage suppliers, quotes and contacts
Every renovation involves more people than you expect: the main contractor, the electrician, the plumber, the tiler, the paint supplier, the kitchen company. Keep one contacts page with each person’s name, trade, phone number, email and the dates they are booked. When you are standing on site and need the plumber’s number, you should find it in five seconds.
For each major purchase, keep a comparison page: three quotes side by side, with the same items in each column so the comparison is honest. Note what each quote includes and excludes — a cheaper quote that excludes delivery and waste removal is not actually cheaper. Write the decision, the date and the reason on the same page.
File every receipt and invoice as a photo or PDF in the notebook, on the page for the room it belongs to. When a warranty question comes up a year later, the receipt is findable in seconds instead of lost in a drawer. Photograph warranties and guarantees too, and note their expiry dates on the room’s budget page.
Step 7: Run the final walkthrough and snagging list
Before you pay the final invoice, walk through every room with your contractor and a snagging list — the list of small unfinished or imperfect items that need fixing. GoodNotes is ideal for this: photograph each snag, annotate the photo with an arrow and a note, and write the agreed fix and date beside it.
Keep the snagging list as one page per room, with a checkbox beside each item. Share the list with the contractor as a PDF export so there is a written record of what was agreed. Tick items off only when you have checked the fix yourself — a snag is not done because someone says it is done, it is done because you have looked at it.
Do not pay the final balance until the snagging list is complete or you have a written agreement about the remaining items and a retention amount held back. This is standard practice, and having the list in GoodNotes makes it easy to enforce without confrontation — you are simply working through a shared, written list.
Common mistakes to avoid
Starting without a written budget. “Roughly ten thousand” is not a budget. Write the total, split it by room and category, and add contingency. If the numbers do not add up on paper, they will not add up in real life either.
Choosing materials from memory. A paint colour looks different in the shop, in daylight, and under your room’s lighting. Keep a physical sample and photograph it in the room, next to the other materials. GoodNotes holds the photo; the sample lives in a labelled bag, not loose in a drawer.
No backup. Turn on iCloud sync and auto-backup, and check that it works. A renovation notebook holds receipts, warranties, measurements and decisions that are painful to reconstruct. Our guide to backing up your GoodNotes planner covers the settings to check.
Deciding alone and informing later. If two people share the home, both should see the same notebook. A decision made in GoodNotes and synced through iCloud is a shared decision; a decision made in one person’s head is a future argument.
Frequently asked questions
Can I use GoodNotes for home renovation planning?
Yes. Build one notebook per project with a section per room, and use it for mood boards, floor plan sketches, budget tracking, timelines, supplier contacts and snagging lists. Import photos, quotes and receipts as PDFs or images so everything lives in one searchable place.
How do I track a renovation budget in GoodNotes?
Use one budget page per room with columns for item, estimated cost, actual cost and difference. Update the actual cost the day you pay, keep a separate contingency page for surprises, and review the totals weekly so overspending is caught early.
Can I share my renovation plans with my contractor?
Yes. Export pages or the whole notebook as a PDF and send it to your contractor, or share specific pages for the room they are working on. Keep the original in GoodNotes so you always have the master copy with your annotations.
Is GoodNotes better than a spreadsheet for renovations?
For numbers alone, a spreadsheet is better. For a renovation, GoodNotes is better, because a renovation is not just numbers — it is photos, sketches, samples, quotes and decisions, and GoodNotes holds all of those together on the same pages as the budget.
What should be on a renovation mood board?
Three to five images showing the style, main material, accent colour and one detail, plus the practical facts beside each: supplier, product code, price and lead time. Mark decisions clearly and cross out rejected options so the board records what you chose and why.
Start your renovation notebook today
GoodNotes for home renovation is not about the app. It is about the moment, six weeks into a project, when someone asks what the tiles cost, when the electrician is coming, or why you chose that paint — and you can answer in seconds instead of digging through a drawer. Build the notebook, photograph the first room, and write the budget down. The rest of the project gets easier from there.
Ready to plan your project? Start with a 2027 Finance Planner to keep your renovation budget honest, and explore the 2027 Life Planner to keep site meetings, deliveries and decision deadlines in one calendar.
Temply Studio
Stop chasing your goals with sticky notes and scattered notebooks. Our premium digital planners and Canva templates are designed to help you plan with intention, stay consistent, and actually enjoy the process.


Questions about this guide?
Ask about the planner, share how you use it, or tell us what to cover next. Your email stays private.