
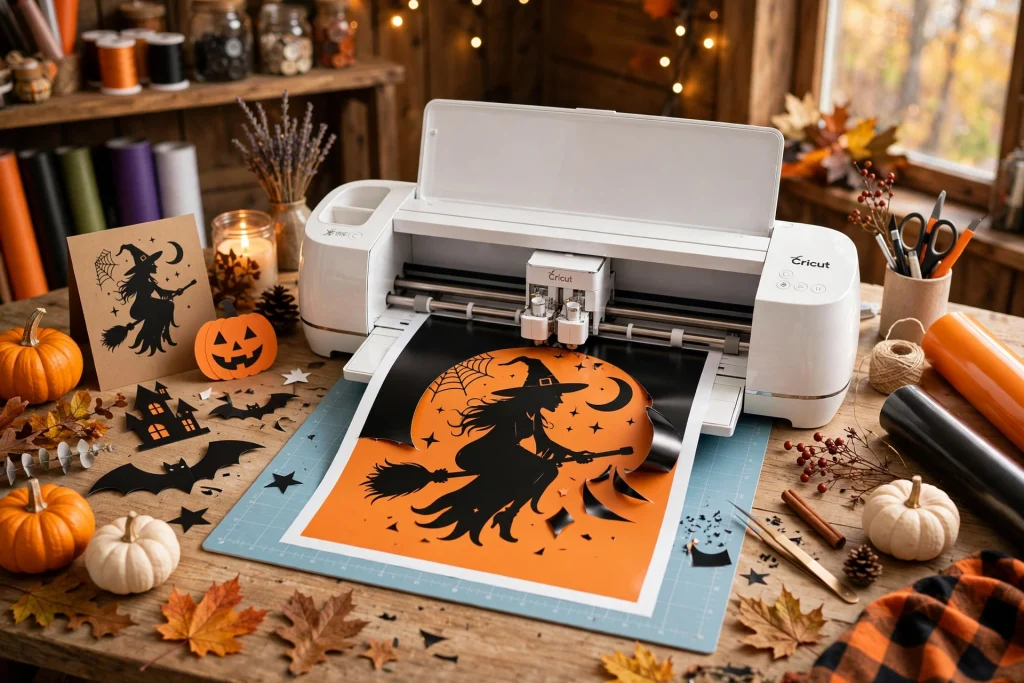
A good halloween svg is the fastest route from a blank craft table to a finished spooky project. SVG files are vector cut files designed for machines like Cricut: instead of printing a design and cutting around it by hand, you upload the file, your machine cuts crisp lines in vinyl, paper, or heat-transfer vinyl, and you press or stick the design onto your project. In this guide, you will learn exactly how to use a halloween svg with Cricut Design Space — uploading, sizing, cutting, weeding, and applying — and then get ten project ideas to make this Halloween season your craftiest one yet.
What Is a Halloween SVG File?
SVG stands for Scalable Vector Graphics. Unlike a photo, which is made of pixels that get blurry when enlarged, an SVG is made of mathematical paths, so it stays perfectly sharp at any size. That makes SVG the ideal format for cutting machines: your Cricut follows those paths with its blade, producing clean edges whether your design is two inches wide or two feet wide.
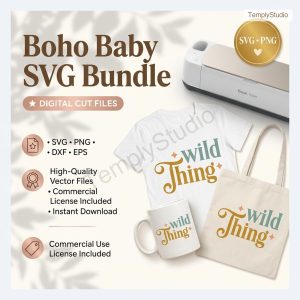
A halloween svg is simply a cut file with a Halloween theme — witches, pumpkins, ghosts, bats, spooky lettering, haunted houses, and funny sayings. Bundles group many designs together so you have options for different projects. Most quality bundles also include the same designs in PNG format (for printing), DXF (for older machines), and sometimes EPS, but SVG is the format Cricut Design Space handles best.
How to Upload an SVG to Cricut Design Space
Uploading your first file takes about a minute once you know where the buttons are. Here is the process step by step.
- Unzip your download. SVG bundles usually arrive as a ZIP file. On a computer, right-click and choose Extract; on a phone or tablet, use your files app to unzip. You need the individual .svg files, not the ZIP itself.
- Open Cricut Design Space and start a new project. Click the Upload button on the left toolbar, then choose “Upload image.”
- Select your SVG file. Browse to the unzipped folder and pick the .svg file. Because SVGs are vector, Design Space skips the background-removal step that raster images need.
- Name and tag it. Give the design a clear name like “Witch Hat Halloween SVG” and add tags such as “halloween” so you can find it later in your library.
- Insert it onto your canvas. Select the uploaded image and click “Insert Images.” The design appears on your canvas, ready to size and cut.
- Resize for your project. Select the design, type the exact width or height you need into the size boxes, and lock the proportions. Measure your blank (shirt, sign, bag) first — guessing sizes is the number one beginner mistake.
One important note about layered designs: many halloween svg files come with multiple color layers. In Design Space these may upload as separate pieces. Use the “Attach” or “Group” functions to keep layers aligned exactly as the designer intended before you cut.
Cut Settings: Vinyl, Paper, and Heat-Transfer Vinyl
Choosing the right material setting is what separates a clean cut from a shredded one. Here are the basics for the three materials you will use most with a halloween svg.
Adhesive vinyl
Adhesive vinyl is the sticky-backed material used for decals, signs, mugs, and window clings. In Design Space, select the “Vinyl” material setting. Always place vinyl shiny side up, backing side down on your cutting mat. A standard fine-point blade handles it easily. After cutting, weed away the excess vinyl, then use transfer tape to move the design onto your surface.
Heat-transfer vinyl (HTV / iron-on)
HTV is how designs get onto t-shirts, tote bags, bodysuits, and fabric trick-or-treat bags. The critical rule: mirror your design before cutting, because you cut the back of the material and flip it onto the fabric. In Design Space, toggle “Mirror” on for every mat when using HTV. Place the material shiny carrier-sheet side down on the mat. Select the “Iron-On” setting (choose the specific type, like Everyday Iron-On, if your material brand offers it). After cutting and weeding, press with a heat press or household iron following the material’s time and temperature guidance.
Cardstock and paper
For banners, gift tags, and paper decorations, use cardstock. Select the “Cardstock” setting matched to your paper weight — light, medium, or heavy. Make sure the mat is sticky enough to hold the paper flat; a worn-out mat lets paper shift mid-cut, which ruins fine details like spider legs and bat wings. For intricate halloween svg designs, slow the cut down if your machine allows it, and use a fresh blade for the crispest edges.
When in doubt, do a small test cut. Cut a one-inch shape in a corner of your material before committing to the full design. Thirty seconds of testing saves a lot of wasted vinyl.
Weeding Tips for Spooky (and Fiddly) Designs
Weeding — removing the negative-space vinyl around your design — is where Halloween designs get tricky. Witch silhouettes, spider webs, and lacy lettering have lots of tiny interior pieces. These tips help.
- Use a weeding hook, not your fingernails. A proper hook or pair of fine tweezers gives you precision without stretching the vinyl.
- Weed on a light surface or use a light pad. Cut lines are much easier to see against light, especially with black vinyl — the unofficial official color of Halloween crafting.
- Start with the big pieces, finish with the details. Peel the large background areas first, then pick out the small centers of letters and tiny shapes.
- Go slow on thin lines. Spider legs, broom bristles, and script lettering tear if you yank. Pull at a low angle, close to the surface.
- Keep the carrier sheet for HTV weeding. Weed HTV while it is still on its clear carrier sheet, design facing up, so the pieces stay exactly where they belong until you press.
10 Spooky Halloween Cricut Project Ideas
Now the fun part. One halloween svg bundle can supply a whole season of projects. Here are ten ideas, ordered roughly from easiest to most ambitious.
1. Halloween t-shirts
The classic starter project. Cut a spooky saying or witch graphic in HTV, mirror it, weed it, and press it onto a plain tee. Matching family shirts (“Mommy Witch,” “Daddy Ghost,” “Little Pumpkin”) are a perennial hit for Halloween parties and pumpkin-patch photos. Dark shirts with orange, white, or glitter vinyl look especially festive.
2. Trick-or-treat bags
Upgrade a plain canvas tote or drawstring bag with a personalized Halloween design: the child’s name in spooky lettering, a grinning jack-o’-lantern, or a flying witch. Press HTV onto the bag and you have a reusable trick-or-treat carrier that doubles as a keepsake. This is a great project for using up HTV scraps.
3. Farmhouse door sign
A round wooden sign on the front door sets the tone for the whole season. Cut a large halloween svg design in adhesive vinyl — a “Welcome Witches” greeting, a haunted house silhouette, a pumpkin mandala — and apply it with transfer tape to a stained or painted wood round. The Welcome Round Sign SVG Bundle is made for exactly this kind of project, with farmhouse-style porch sign designs that work beautifully in fall and Halloween color schemes.
4. Baby bodysuit
Baby’s first Halloween deserves a custom bodysuit. A tiny “My First Halloween” or “Little Boo” design in soft HTV presses onto a plain white onesie in minutes. Keep the design small (three to four inches wide) and use gentle, baby-safe materials. The Baby SVG Bundle includes sweet sayings sized for bodysuits and nursery decor, so you can match the outfit to the nursery theme.
5. Halloween mugs
Permanent adhesive vinyl turns a plain mug into a Halloween gift. A witch hat, a “Witch’s Brew” label, or a spooky monogram wraps nicely around a standard mug. Apply with transfer tape, burnish firmly, and let the vinyl cure for a day or two before washing. Note: vinyl mugs are hand-wash only — the dishwasher will eventually lift the edges.
6. Wall decals
Removable vinyl lets you decorate walls without commitment. Bats flying across a hallway wall, a haunted house silhouette behind the couch, or spooky lettering over a mantel all come off cleanly after the season. Cut in matte black for a classic look, or use glow-in-the-dark vinyl for a hallway that startles guests after lights-out.
7. Party banners
Cut banner letters or shapes from cardstock — “Happy Halloween,” “Trick or Treat,” rows of pumpkins and ghosts — punch holes, and string them on twine or ribbon. Cardstock banners are cheap, fast, and look fantastic over a dessert table or across a mantel. Layer two colors of cardstock for a dimensional look with almost no extra effort.
8. No-carve pumpkin decals
Love decorated pumpkins but hate the mess of carving? Adhesive vinyl faces, words, and patterns stick right onto real or faux pumpkins. A jack-o’-lantern face in black vinyl on an orange pumpkin reads perfectly from the porch, and vinyl monograms on white pumpkins look elegant enough for a fall tablescape. The vinyl peels off when the season ends — or stays on a faux pumpkin for next year.
9. Window clings
Static-cling or removable vinyl on windows makes your house look decorated from the street with almost no effort. Silhouettes of witches, cats, and bats on front windows, or spooky sayings on a glass door, catch the eye of every trick-or-treater. Because there is no adhesive residue with static cling, cleanup is instant.
10. Halloween gift tags
Small, quick, and endlessly useful. Cut gift tags from kraft or black cardstock with a halloween svg accent — a tiny bat, a mini pumpkin, a “Spooky Treats” label — and tie them onto party favors, teacher gifts, or goodie bags. Tags are the perfect project for vinyl and cardstock scraps, and they make even store-bought candy feel personal.
Choosing a Quality Halloween SVG Bundle
Not every file labeled “SVG” is actually cut-ready. Before you buy, check that the bundle includes true vector SVG files (not just PNGs renamed), that designs are cleanly layered for multi-color projects, and that the license covers what you plan to make — personal use is standard, while selling finished shirts or signs usually needs a commercial license. The 10 Halloween Witch SVG Designs bundle is a solid example: witch-themed cut files built for Cricut, with the layered, weeder-friendly paths that make the difference between a fun evening and a frustrating one.
A few buying tips: look at the preview images closely and zoom in — jagged edges in the preview mean jagged cuts. Prefer bundles with both SVG and PNG included, so you can print as well as cut. And read the license terms before you list anything for sale; most designers offer an affordable commercial upgrade.
Frequently Asked Questions
What is a halloween svg file?
A halloween svg is a scalable vector cut file with a Halloween theme — witches, pumpkins, ghosts, bats, or spooky lettering. You upload it to Cricut Design Space, and your machine cuts the design from vinyl, paper, or heat-transfer vinyl for craft projects.
Do I need to mirror my design when using iron-on vinyl?
Yes. Always mirror (flip horizontally) your design before cutting heat-transfer vinyl, because you cut the back of the material and then flip it onto the fabric. Forgetting to mirror is the most common HTV mistake — your text will come out backwards. Adhesive vinyl and cardstock do not need mirroring.
What is the difference between SVG and PNG for Cricut?
SVG files are vector: they scale to any size without losing quality and cut as clean paths. PNG files are raster images made of pixels: they work for print-then-cut projects but can look jagged when enlarged, and Design Space has to trace them before cutting. For pure cutting projects, SVG is always the better choice.
Can I sell shirts I make with a halloween svg bundle?
It depends on the license. Most bundles include personal use; selling finished physical products usually requires a commercial license, which many designers offer as an upgrade. Always check the license terms of the specific bundle you buy before selling anything you make with it.
Why is my Cricut tearing intricate Halloween designs?
Tearing usually means a dull blade, the wrong material setting, or a mat that no longer holds the material flat. Try a fresh fine-point blade, double-check that you selected the right material in Design Space, and do a small test cut first. For very intricate designs like spider webs, slowing the cut speed also helps.
Ready to start crafting? Grab a halloween svg bundle you love, pick one project from the list above, and make something spooky this weekend — by Halloween, you will be the house with the best-decorated porch on the street. Get the 10 Halloween Witch SVG Designs here and let the haunting begin.
Temply Studio
Stop chasing your goals with sticky notes and scattered notebooks. Our premium digital planners and Canva templates are designed to help you plan with intention, stay consistent, and actually enjoy the process.

Questions about this guide?
Ask about the planner, share how you use it, or tell us what to cover next. Your email stays private.