
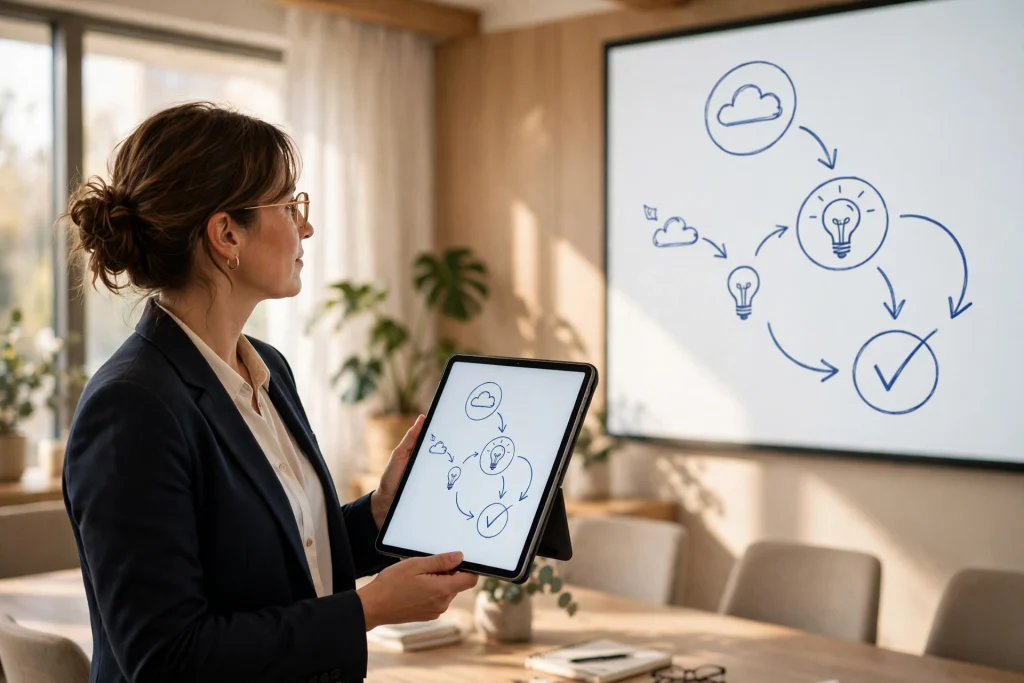
Quick answer: To use GoodNotes presentation mode, connect your iPad or iPhone to an external screen with AirPlay or a cable, open your notebook, and choose what the audience sees. You can present, annotate live, and use the laser pointer — but Presentation Mode is iOS-only, so it does not work on Mac, Android, Windows, or the web.
GoodNotes presentation mode turns your iPad into a digital whiteboard. Connect it to a projector or a TV, and your handwritten notes become the presentation: no slides to build, no files to convert, just the notebook you already use, shown large, with your annotations appearing live as you write them. Teachers use it for lessons, managers for team briefings, and students for group presentations — and it takes about two minutes to set up once you know the steps.
This guide walks through exactly how to use GoodNotes presentation mode, from connecting the screen to using the laser pointer, the three ways your audience can see your page, and the common problems that catch first-time presenters out.
What Is GoodNotes Presentation Mode?
Presentation Mode is a GoodNotes 6 feature that lets you present a notebook on an external screen while keeping your own controls private. With Mirror Presenter Page or Mirror Full Page selected, it hides the GoodNotes interface — the toolbar, the page thumbnails, the library — from your audience, so they see only the page itself. Mirror Entire Screen instead shows the whole device display, interface included. You keep full control on your iPad; with a presenter-page or full-page option the audience sees a clean, distraction-free page.
It is built for live teaching and presenting, not for recording polished videos. The magic is in the interaction: you write, underline, circle, and sketch on your iPad, and every stroke appears on the big screen in real time. A lesson feels like a conversation rather than a lecture, because you can respond to a question by drawing the answer instead of hunting for the right slide.
One important limit first: Presentation Mode is available on iPad and iPhone only. It is not currently supported in Goodnotes for macOS, Android, Windows, or Web. If your team presents from a Mac or a Windows laptop, plan around the iPad — or use screen sharing from the iPad instead, which we cover below.
What You Need Before You Present
Before the meeting starts, check these four things. Every failed presentation we have seen traces back to one of them.
- An iPad or iPhone with GoodNotes 6 installed. Presentation Mode is part of GoodNotes 6, so update the app if you are still on an older version.
- A way to connect to the screen. Either AirPlay Screen Mirroring to an Apple TV or AirPlay-compatible display, or a wired connection with an HDMI or USB-C cable and the right adapter for your iPad.
- The notebook open and ready. Open the document you will present before you connect. Have the pages you need bookmarked or in order, so you are not scrolling through your library in front of an audience.
- A charged iPad and an Apple Pencil. Presenting drains battery faster than note-taking, and a dead Pencil mid-lesson is exactly the interruption you do not need. Charge both, and keep a spare tip in your bag.
Do a two-minute test run before the real thing. Connect, open a page, draw a line, and check that it appears on the external screen. The test takes less time than apologising for a technical delay in front of a room full of people.
How to Use GoodNotes Presentation Mode: Step by Step
- Mirror your screen. Swipe down from the top-right corner to open Control Centre, tap Screen Mirroring, and choose your display. Or connect your HDMI or USB-C cable. Wait until the iPad screen appears on the external display.
- Open your notebook in GoodNotes. Open the document while mirroring is active, and navigate to the first page you want to present.
- Choose what your audience sees. Open Share and Export in GoodNotes and select a presentation option to control what appears on the external screen. Pick the option that matches your situation — the three choices are explained in the next section.
- Hide the interface. With Mirror Presenter Page or Mirror Full Page, Presentation Mode removes the toolbar and page thumbnails from the audience’s view; Mirror Entire Screen keeps your interface visible. Your iPad still shows your controls, so you can switch tools without the audience seeing the menus.
- Present and annotate. Write, highlight, and sketch directly on the page. Everything you draw appears on the external screen as you draw it.
- Use the laser pointer to direct attention. Select the Laser Pointer from the toolbar when you want to point at something without marking the page. It is covered in detail below.
- Move between pages smoothly. Swipe or tap to change pages. With Mirror Presenter Page, page-switching animations are shown to the audience, which keeps the presentation feeling deliberate rather than jumpy; Mirror Full Page hides those animations and shows the complete page without zooming.
- End cleanly. When you finish, stop mirroring from Control Centre or unplug the cable. Your annotations are saved in the notebook automatically, so nothing is lost.
The Three Ways Your Audience Sees Your Page
Presentation Mode has three preferences that determine what the audience sees on the external screen. Knowing the difference matters, because the wrong choice either shows them too much or hides what they need.
Mirror Presenter Page
This shows the current page, your zooming, and your page-switching animations — while hiding other Split View apps. For most presentations it is the right choice: the audience follows exactly what you are doing, without seeing your other apps or your library.
Mirror Entire Screen
Mirror Entire Screen shows exactly what appears on your device, including the GoodNotes interface, notifications and other apps. Useful if you need to jump between GoodNotes and another app during the presentation, but risky: a message notification or an accidental swipe shows up on the big screen. Turn on Do Not Disturb first if you choose this option.
Mirror Full Page
Mirror Full Page shows the complete page without zooming or page-switching animations, and hides other Split View apps. It is the cleanest option for a formal presentation or a recorded session, where the page itself is the whole point.
For most teaching and meeting situations, Mirror Presenter Page is the right balance: your audience sees your work, not your workspace.
The Laser Pointer: Dot vs Trail
The laser pointer is the presenter’s best friend in GoodNotes. It lets you direct attention without leaving a mark on the page — point at the key figure, circle the important line, and move on. The Laser Pointer is always available in the toolbar; if you do not see it, swipe across the toolbar or check your toolbar accessories.
There are two styles, and they serve different purposes:
- Dot. A red dot follows your touch on the screen. Use it when you are talking through a diagram or a paragraph and want the audience’s eyes to follow yours. It is the digital equivalent of pointing with your finger.
- Trail. Drawing on the screen adds a temporary laser trail that disappears after about one second. Use it to circle a region, underline a phrase, or sketch a quick arrow that you do not want to keep. The trail is perfect for emphasis you want to vanish on its own.
One practical tip: switch to the laser pointer before you start talking about the detail. Fumbling through the toolbar while the room waits breaks the flow. If you present often, add the Laser Pointer to your main toolbar so it is always one tap away.
Annotate Live While You Present
Live annotation is what separates GoodNotes from a slide deck. You are not clicking through pre-made slides; you are building the explanation in front of your audience, and that keeps people engaged.
Use the pen for writing and the highlighter for emphasis. Keep your strokes big and your writing larger than usual — what is readable on an iPad at arm’s length is not necessarily readable from the back of a room. Two or three words per line, written large, beats a dense paragraph every time.
Shapes are surprisingly useful while presenting. A quick rectangle around a key number, a circle around a deadline, an arrow connecting two ideas — these take a second with the shape tool and make the structure of your argument visible. If you want to prepare your pages for this kind of live work, our guide to using GoodNotes as a digital whiteboard covers the same tools in a brainstorming context.
Remember that everything you write during a presentation is saved in the notebook. After the session, you can export the annotated pages as a PDF and share them with the audience — a handout that actually reflects what was discussed, not what was planned.
Goodnotes Education: Preparing and Teaching Modes
This subsection applies only to Goodnotes Education, the separate classroom product — Preparing and Teaching are not a toggle in the standard GoodNotes 6 app covered by this guide. In Goodnotes Education, Preparing Mode is where a teacher builds a Lesson: creating worksheets, placing Answer Zones and laying out the material students receive. Teaching Mode is the live classroom state: a teacher’s Present annotations stay on the teacher’s presentation version only, while Feedback annotations target a specific student.
The practical difference is who sees the changes. In Preparing Mode, every change to the document is instantly visible to all students, so it suits base material the whole class should receive. Teaching Mode keeps a teacher’s Present annotations on the teacher’s version only. These modes require a Goodnotes Education setup with Lessons and a Class Folder of students — see Goodnotes’ Education help for the full Lesson workflow.
If you teach regularly, build a dedicated “teaching” copy of each lesson notebook. Keep the original as your master, and present from the copy. That way, live annotations from one class never pollute the clean version you will teach again next term.
Presenting Without an External Screen
Not every presentation has a projector. GoodNotes presentation mode still helps in two common situations.
Video calls. Share your iPad screen in Zoom, Teams, or Meet, then present from GoodNotes the same way you would to a projector. Sharing your iPad screen mirrors everything on it — including the interface — and the laser pointer works exactly the same. It is one of the simplest ways to make a remote meeting feel less like a slide deck and more like a conversation.
Recorded lessons. Use iOS screen recording while you present, and narrate as you annotate. The result is a lesson video with your voice and your handwriting, made with no extra software. If you record lectures this way, our guide to recording lectures in GoodNotes covers the audio setup and the export options in detail.
Common Problems and Quick Fixes
| Problem | Fix |
|---|---|
| External screen shows the whole iPad, including notifications | Choose Mirror Presenter Page instead of Mirror Entire Screen, and turn on Do Not Disturb. |
| Laser pointer is missing from the toolbar | Swipe across the toolbar to reveal it, or add it from the toolbar accessories. |
| AirPlay drops mid-presentation | Use a wired HDMI or USB-C connection for important sessions; keep Wi-Fi strong and close to the display. |
| Writing is too small to read from the back | Write larger than usual, use the zoom window, and test readability from the furthest seat. |
| Presentation Mode is not available | Check you are on iPad or iPhone — it is not supported on Mac, Android, Windows, or Web. |
| Pages advance too fast when swiping | Use deliberate taps on the page edge rather than quick swipes, or navigate from the thumbnail view. |
Presentation Mode vs a Slide Deck: When to Use Which
GoodNotes presentation mode is not a replacement for Keynote or PowerPoint. It is a different tool for a different kind of presentation. Use GoodNotes when the content is handwritten, when you need to respond to questions by drawing the answer, when you are teaching a process step by step, or when the material lives in a notebook already.
Use slides when the presentation needs precise layouts, embedded video, animations, or a polished design that will be shared widely. Slides are better for a conference talk; GoodNotes is better for a tutorial, a lesson, or a working session where the audience’s questions shape what happens next.
Many presenters use both: slides for the structure, GoodNotes for the worked examples. Present the agenda from slides, then switch to GoodNotes when it is time to solve the problem live. The switch takes seconds with AirPlay, and the audience gets the best of both.
Frequently Asked Questions
Does GoodNotes presentation mode work on Mac?
No. Presentation Mode is available on iPad and iPhone only. It is not currently supported in Goodnotes for macOS, Android, Windows, or Web. To present from a Mac, share your iPad screen instead, or present from the iPad directly.
How do I connect my iPad to a projector for GoodNotes?
Use AirPlay Screen Mirroring from Control Centre if the display supports it, or connect with an HDMI or USB-C cable and the right adapter. Open your notebook while mirroring is active, then choose your presentation option in GoodNotes.
What is the difference between Dot and Trail laser pointer?
Dot shows a red dot that follows your touch — best for pointing at a specific detail. Trail draws a temporary line that disappears after about one second — best for circling a region or underlining something without leaving a permanent mark.
Can the audience see my toolbar and page thumbnails?
It depends on the option you choose. With Mirror Presenter Page or Mirror Full Page, the interface is hidden from the external screen, so the audience sees only the page; Mirror Entire Screen shows your interface too. You always keep your own controls on the iPad itself.
Are my live annotations saved after the presentation?
Yes. Everything you write during a presentation is saved in the notebook automatically. You can export the annotated pages as a PDF afterwards and share them as a handout.
Ready to present from your iPad? Start with a notebook built for the job. The 2027 Life Planner gives you dated pages, trackers, and planning spreads that present beautifully in GoodNotes — open it, connect your screen, and your next presentation is already written.
Temply Studio
Stop chasing your goals with sticky notes and scattered notebooks. Our premium digital planners and Canva templates are designed to help you plan with intention, stay consistent, and actually enjoy the process.
Questions about this guide?
Ask about the planner, share how you use it, or tell us what to cover next. Your email stays private.