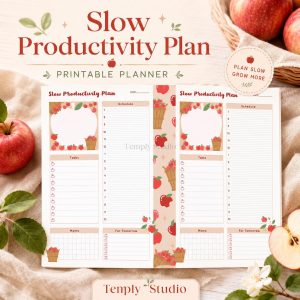





A daily planner for time blocking gives important work a realistic place in your day. Instead of keeping a long, open-ended task list, you decide when to begin each priority. The method works best when the blocks are flexible enough for real interruptions and specific enough to guide your next action.
This guide explains how to use a daily planner for time blocking in ten practical steps. It is a planning method, not a promise of higher productivity. Your schedule still needs to reflect your energy, responsibilities, appointments, and the amount of time each task actually requires.
1. Start with a short list of real commitments
Before creating time blocks, write down the commitments that cannot move easily. Include appointments, classes, work shifts, travel, meals, care responsibilities, and deadlines. These are the anchors of your day.
Do not begin with every task you might like to finish. A daily plan becomes difficult to use when it treats optional tasks as fixed appointments. Start with what is already true, then add the work that matters most around it.
2. Choose one to three priorities
Review your task list and choose the one to three outcomes that would make the day feel meaningful. A priority should be an outcome, not a vague category. “Prepare the presentation outline” is easier to schedule than “work on presentation.”
If everything is marked urgent, nothing helps you decide what comes first. Keep a longer list elsewhere if you need one, but let the daily planner show only the work you are genuinely ready to schedule.
3. Estimate the work before assigning a block
Give each priority a rough time estimate. Use a range when you are unsure, such as 30–45 minutes or 90–120 minutes. The purpose is not to predict the future perfectly. It is to notice when your task list is larger than the available day.
Break large projects into visible actions. “Research three sources,” “write the first section,” and “review the draft” can each receive a separate block. Smaller actions make it easier to start and easier to move one block when the day changes.
4. Put fixed events into the planner first
Draw the blocks that cannot move, then look at the spaces around them. Leave transition time between events when you need to travel, change tools, prepare materials, or simply reset your attention.
For example, a meeting from 10:00 to 11:00 is not always a single 60-minute block. You may need 10 minutes to prepare and another 10 minutes to record follow-up actions. Planning those edges prevents the rest of the schedule from becoming unrealistically tight.
5. Add focused work blocks
Place your most important focused task into a block when you are most likely to have enough attention for it. Label the block with a clear action and a finish point:
- 08:30–09:15 — outline the introduction
- 09:30–10:00 — answer three priority emails
- 13:00–14:00 — complete the first spreadsheet section
Avoid labels such as “be productive” or “catch up.” A useful block tells you what to open, what to do, or what small result to finish.
6. Group small tasks into a flexible admin block
Short tasks can interrupt a day when they are scattered everywhere. Group similar items into one flexible block for messages, filing, calls, errands, or routine administration.
Keep the block flexible when the exact order does not matter. You can write a short list inside it, but do not turn every five-minute action into a separate appointment. The block is there to contain small work, not to make the planner harder to read.
7. Add breaks and transition space
Breaks are part of the schedule, not evidence that the plan failed. Add a short pause after a demanding block, and include time to switch between different types of work.
Transition space is especially useful when your day includes commuting, caregiving, practical tasks, or meetings that may run over. If every minute is assigned, one delayed activity can make the entire plan feel unusable.
8. Mark the next action, not every possible detail
When a task needs several sessions, write the next visible action in each block. For example:
| Project | Next scheduled action |
|---|---|
| Course assignment | Gather the three required references |
| Client proposal | Draft the pricing section |
| Home project | Measure the available shelf space |
This keeps the planner focused on movement. You can store deeper project notes in a separate project list or reference document rather than filling every daily block with background information.
9. Review the plan at midday
Plans are working documents. At midday, check what is complete, what moved, and what is no longer important. Move unfinished work to a new realistic block instead of leaving it crossed out across several time slots.
Ask three questions:
- What must still happen today?
- What can be moved without creating a problem?
- What should be broken into a smaller next action?
A short review makes the plan reflect the day you are actually having.
When a 45-minute block gets interrupted
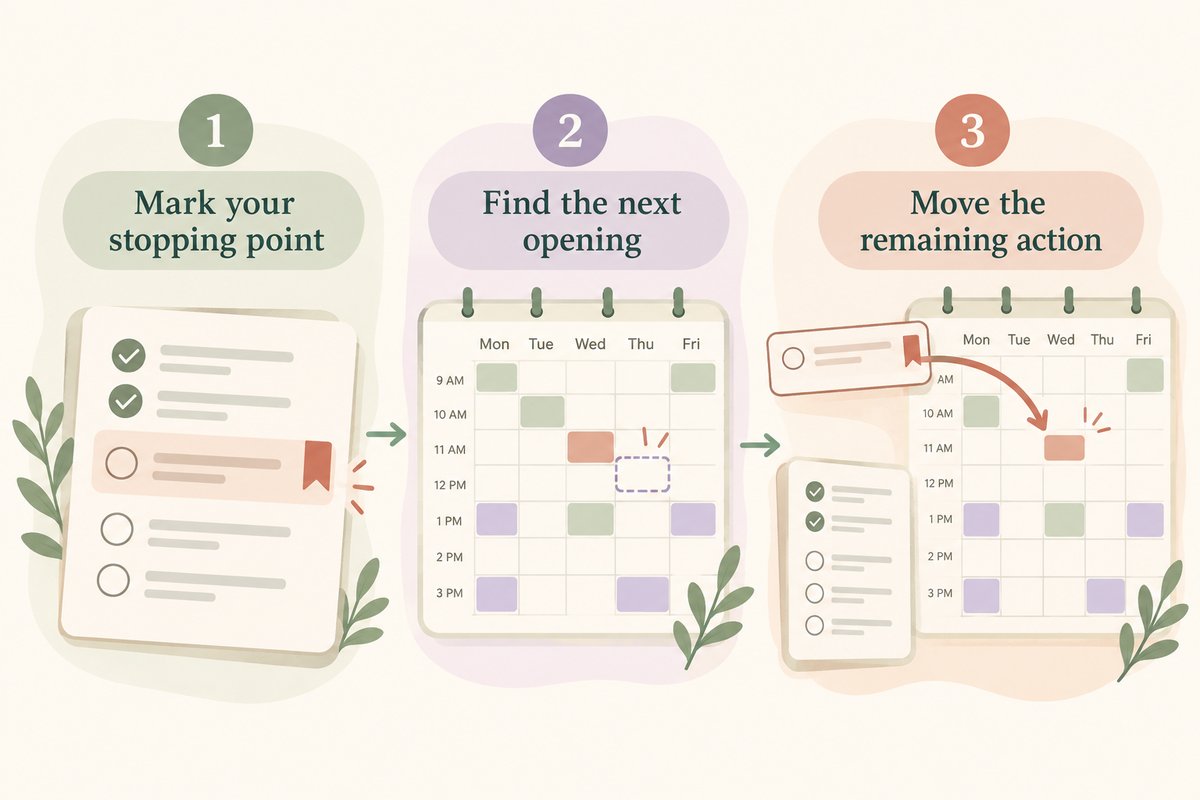
Suppose you planned to draft an introduction from 08:30 to 09:15, but an urgent call uses the final 20 minutes. Write a stopping note such as “outline finished; next write the opening paragraph.” Check the remaining day’s fixed commitments, then place those 20 minutes in a genuine opening. If none exists, move the task to another day or reduce a lower-priority commitment; do not stack it onto an already full block.
This keeps your daily planner for time blocking usable after a disruption. Cal Newport’s discussion of revising daily plans makes the same general distinction: use the plan to guide deliberate choices rather than judge the day by whether the original schedule survived unchanged.
10. Close the day with a simple reset
At the end of the day, record completed work, open loops, and the first useful action for tomorrow. Keep this review short. It is not a second planning project.
Move unfinished tasks deliberately. Some belong on tomorrow’s schedule, some belong on a later date, and some no longer deserve space. This habit keeps the next daily page from becoming a copy of everything that was not finished today.
A sample daily planner for time blocking
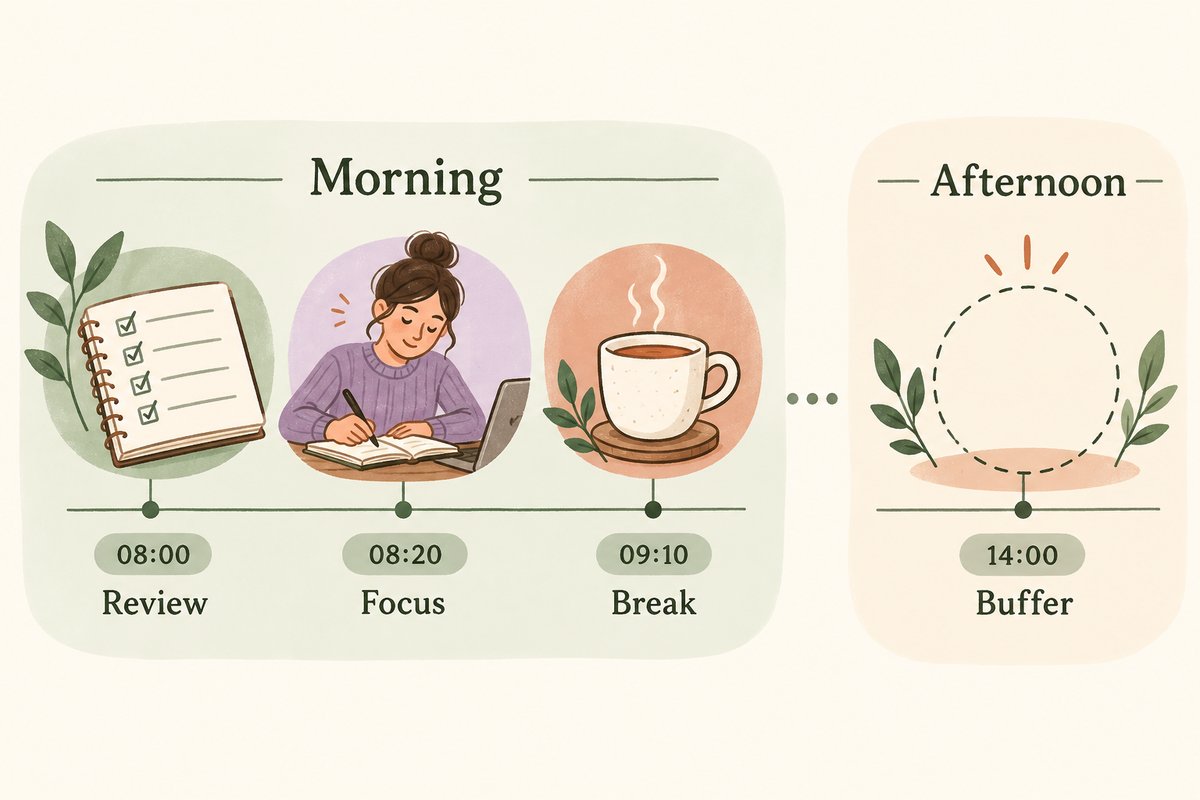
Here is a simple example that leaves room for changes:
| Time | Block |
|---|---|
| 08:00–08:20 | Review commitments and choose priorities |
| 08:20–09:10 | Focused priority work |
| 09:10–09:30 | Break and transition |
| 09:30–10:30 | Fixed appointment |
| 10:30–11:00 | Follow-up notes and messages |
| 11:00–12:00 | Second focused work block |
| 12:00–13:00 | Meal and reset |
| 13:00–14:00 | Flexible admin block |
| 14:00–14:20 | Buffer for delays |
| 14:20–15:00 | Final priority action |
| 15:00–15:10 | Review and plan the next step |
The exact times are not a prescription. The useful part is the sequence: anchors first, priorities next, then breaks, buffers, and a short review.
Choose a daily planner for time blocking that fits your day
Look for a layout that lets you see the day’s time structure without hiding the actions you need to complete. Some people prefer a page divided into hours, while others use a smaller schedule beside a task list. The right choice depends on how often your day changes and how much detail you need at a glance.
If you are comparing dated and undated planning, the dated versus undated digital planner guide can help you think through the tradeoff. If page orientation affects how you review a schedule, see the portrait versus landscape digital planner guide. Browse the Digital Planners collection only after checking the individual product page for the exact file and software information stated for that item.
Common time-blocking mistakes
Filling every minute
An entirely full schedule leaves no room for transitions, questions, delays, or rest. Leave open space where your day genuinely needs it.
Using blocks as a guilt list
If a block moves, update it. The planner is there to support decisions, not to record a failure.
Making blocks too vague
“Work on project” does not tell you how to begin. Name the next action and a reasonable finish point.
Planning without checking capacity
Estimate the work before you schedule it. If the available time cannot hold the list, reduce the list before adding more detail.
Frequently asked questions
How many time blocks should a day have?
There is no universal number. Start with fixed commitments, one to three priority blocks, a flexible admin block, breaks, and a short review. Add detail only when it helps you make a decision.
What should I do when a time block is interrupted?
Write down where you stopped, move the remaining action to the next realistic opening, and continue with the current priority. Do not rebuild the entire day for one interruption.
Is time blocking the same as a to-do list?
No. A to-do list records possible tasks. Time blocking assigns selected tasks to parts of the day. Many people use both: the list stores options and the daily planner shows today’s commitments.
Can I use time blocking with an undated planner?
Yes. An undated layout can work when your schedule varies or when you do not want unused dated pages. The important part is that the page gives you a clear place for time, priorities, and a short review.
Final checklist
Before closing the page, confirm that you have:
- added fixed commitments first;
- selected one to three priorities;
- estimated the work honestly;
- left transition and buffer space;
- written the next action in each focus block;
- created a flexible block for small tasks; and
- chosen a realistic first action for tomorrow.
A daily planner for time blocking is most useful when it helps you choose the next action and adjust when the day changes. Keep the system visible, specific, and flexible enough to use again tomorrow.
Temply Studio
Stop chasing your goals with sticky notes and scattered notebooks. Our premium digital planners and Canva templates are designed to help you plan with intention, stay consistent, and actually enjoy the process.


Questions about this guide?
Ask about the planner, share how you use it, or tell us what to cover next. Your email stays private.