

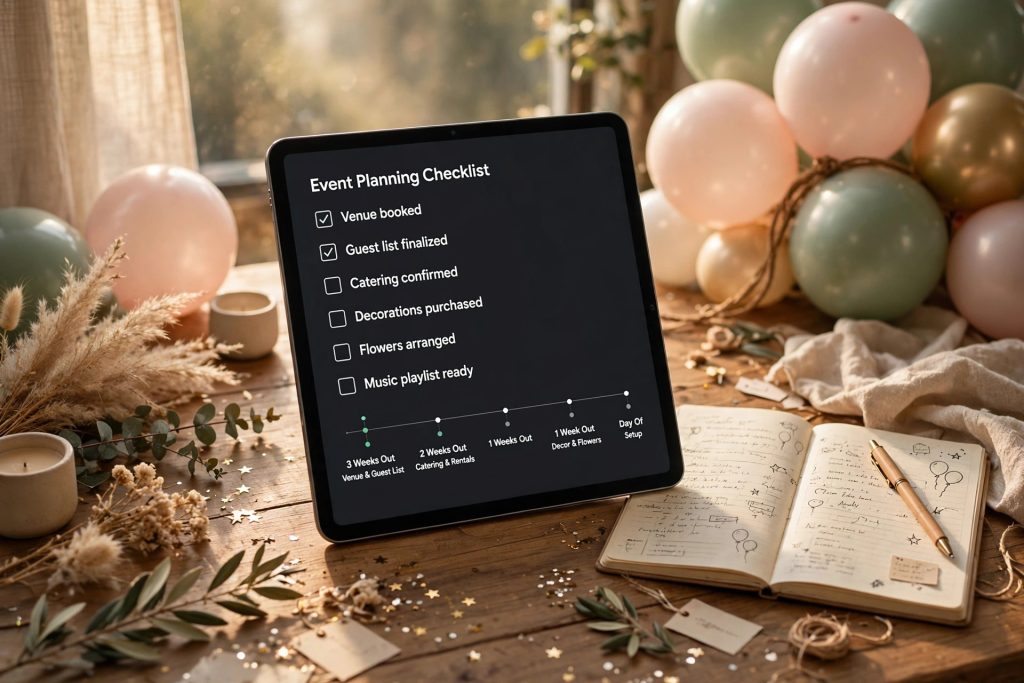
Planning an event means holding a hundred moving parts in your head at once: the venue deposit, the caterer’s final headcount deadline, your aunt’s plus-one, the DJ’s setup time, and a budget that keeps creeping upward. GoodNotes for event planning turns that chaos into one calm, searchable notebook on your iPad — a place where your timeline, guest list, vendor notes, budget, and day-of run sheet all live together and travel with you to every venue visit, tasting, and supplier meeting.
Unlike a paper binder left at home or a spreadsheet that is awkward to open at a florist’s shop, a GoodNotes event notebook is always in your bag and always up to date. Scribble a seating idea during a phone call, paste in a photo of a table setting, and share a clean PDF page with your partner or vendors in seconds.
Quick Answer: Can You Plan an Event in GoodNotes?
Yes. GoodNotes for event planning works because it combines handwriting, hyperlinked tabs, checklists, and imported PDFs in a single notebook. Set up one notebook per event with sections for your timeline, guest list, vendors, budget, and day-of plan, and use a short weekly review to keep every section current. For most weddings, birthdays, and corporate events, that one notebook replaces a binder, three spreadsheets, and a dozen loose notes.
Why Use GoodNotes for event planning?
Event planning is a dozen small jobs — booking, budgeting, inviting, chasing RSVPs, confirming vendors, and coordinating the day itself — spread over weeks or months. The tools most people reach for each solve only one piece: a spreadsheet tracks numbers but not sketches, a notes app holds lists but not a floor plan, and a paper binder holds everything but cannot be searched or shared easily. GoodNotes sits in the middle, and that is exactly why it works so well for events.
- Everything in one place. Your timeline, guest list, vendor quotes, budget, inspiration photos, and contracts live in a single notebook instead of scattered across apps.
- Handwriting plus typing. Sketch a table layout by hand on one page, then type a clean vendor list on the next. Handwriting recognition means you can find a scribbled note weeks later.
- Hyperlinked tabs. Jump from the timeline to the guest list to the budget with one tap, the way you would flip tabs in a binder — except the tabs never tear or fall out.
- Photos and PDFs in context. Paste a photo of the venue’s dance floor next to your layout notes, or import a vendor’s quote as a PDF beside your comparison table.
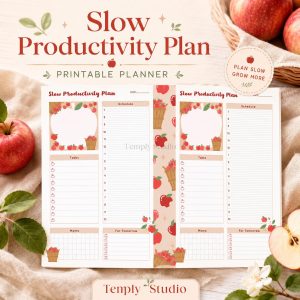
If you already plan your weeks in GoodNotes, an event notebook feels natural. If you are new to digital planning, an event is a great first project: the structure is simple and the payoff is immediate. A solid starting point is the 2027 Life Planner, which gives you the dated daily and weekly pages an event timeline can sit inside, so planning tasks show up alongside the rest of your life instead of in a separate system you forget to open.
How to Set Up Your Event Planning Notebook in GoodNotes
Good setup takes about thirty minutes and saves you hours later. Build the skeleton first, then fill it in as decisions are made.
Step 1: Create one notebook per event
One event, one notebook. Do not mix your wedding and your company’s holiday party in the same file. Name it clearly — “Emma & James Wedding — June 2027” — and give it a cover page with the event name, date, venue, and key people. That cover page is your anchor: every time you open the notebook, you see the essentials at a glance.
Step 2: Build your section tabs
Create a section for each part of the plan, in the order you will use them most:
- Overview — event details, vision, must-haves, and non-negotiables.
- Timeline — the master countdown from twelve weeks out to the day itself.
- Guest List — names, contact details, RSVP status, dietary needs, and seating notes.
- Vendors — one page per vendor, plus a comparison page.
- Budget — estimates, quotes, deposits paid, and remaining balances.
- Design & Inspiration — colour palette, photos, table layouts, and mood-board pages.
- Day-Of Plan — the run sheet, contact list, and emergency kit checklist.
- Notes — a running capture inbox for ideas, phone-call notes, and decisions.
Step 3: Choose your page templates
Use dotted or lined pages for notes, checklist pages for the timeline and day-of plan, table pages for the guest list and budget, and blank pages for floor plans and seating sketches. Keep the same template for the same job every time: when your guest list always looks the same, your eye finds a missing RSVP in seconds.
Step 4: Set up a weekly review habit
A notebook only works if you open it. Pick a fixed fifteen-minute slot each week — Sunday evening works well — to update the timeline, chase outstanding RSVPs, log new spending, and move next week’s tasks onto your daily pages. Pair the event notebook with a daily planner such as the Minimalist Daily Planner so the week’s event tasks appear on your actual to-do list.
The Master Timeline: 12 Weeks Out to Day-Of
The master timeline is the backbone of your event notebook: everything else — the guest list, the vendors, the budget — hangs off it. Build it as a checklist with dates, not a vague list of intentions, with a due date, an owner, and a checkbox per item. For a wedding or a large corporate event, start twelve weeks out or earlier. For a birthday or a smaller gathering, compress the early weeks and keep the final two weeks as written — the last fortnight is where most events are won or lost.
12 to 10 weeks out: lock the big decisions
- Confirm the date, venue, and guest count range, and pay the venue deposit.
- Set the total budget and split it into categories: venue, food and drink, vendors, décor, attire, and a 10% contingency.
- Book the vendors with the longest lead times: caterer, photographer, and entertainment.
- Draft the guest list and agree on the final number with your partner or co-host.
8 to 6 weeks out: send, order, and confirm
- Send invitations and note the RSVP deadline on the guest list page.
- Order anything custom: invitations, signage, favours, or branded materials for a corporate event.
- Confirm menus, dietary options, and the bar plan with the caterer.
- Start the seating plan in pencil — it will change, and that is normal.
4 to 3 weeks out: chase and finalise
- Chase outstanding RSVPs and lock the final headcount for the caterer and the venue.
- Confirm final numbers, timings, and setup requirements with every vendor in writing.
- Finalise the seating plan and table layout, and sketch it on a blank page.
- Do a venue walk-through with your run sheet in hand and note where everything goes.
2 weeks out and the final week: details, then freeze
- Confirm the final guest count, dietary needs, and seating with the caterer and venue.
- Prepare place cards, table numbers, and signage, or confirm who is printing them.
- Pack the day-of emergency kit and confirm arrival times, parking, and load-in details with every vendor.
- Freeze the guest list and seating plan. Print the run sheet and share it with your coordinator, vendors, and key helpers.
- Do a final budget check: what is paid, what is due on the day, and who pays it. Then rest — a tired host makes worse decisions than a rested one with a slightly imperfect playlist.
Tip: write the timeline once as a dated checklist, then copy the current week’s tasks onto your daily pages each Sunday. The master timeline shows the whole journey; your daily pages show what today actually requires.
Guest Lists and RSVP Tracking That Actually Works
The guest list is where most events quietly go wrong. Not because anyone is careless, but because the list lives in three places at once: a spreadsheet, a group chat, and someone’s memory. By the time the caterer asks for a final number, nobody is sure whether your cousin’s plus-one was ever confirmed. Fix this by keeping exactly one guest list, in your GoodNotes notebook, and making it the only source of truth. Every change goes there first. If someone RSVPs by text, update the notebook before you reply.
A guest list layout you can copy
Give each guest one row, with columns for name, group (family, friends, work, or plus-one), invitation date, RSVP status (yes, no, or awaiting), plus-one name or a clear “none”, dietary needs, table number, and notes such as accessibility or children attending. At the top of the page, keep a summary box you update each week: invited, confirmed yes, confirmed no, awaiting, and total expected.
How to chase RSVPs without being awkward
Set the RSVP deadline two weeks before the caterer’s final-number deadline — that buffer is your insurance against late replies. Send one friendly reminder three days before your deadline to everyone still marked “awaiting”. Then call, do not text, the final few: a quick call resolves in two minutes what a week of unanswered messages will not. Finally, decide your default in advance and write it on the guest list page: if someone never replies, are they counted in or out?
For weddings, the guest list also feeds the seating plan and the budget — every confirmed guest is a plate, a chair, and a place card. That is why the GoodNotes wedding planner guide pairs the guest list with the timeline and budget in one notebook, rather than treating them as separate documents.
Seating plans without the tears
Do the seating plan on a blank GoodNotes page, not in your head. Draw the tables, write names on boxes you can drag around, and seat everyone with at least one person they know well. Keep the head table small and put speakers where they can reach the microphone. Photograph the final plan and keep the photo on the day-of page, so anyone helping with place cards can check it without asking you.
Vendor Notes and Contact Pages
Every vendor relationship follows the same arc: enquiry, quote, comparison, booking, deposit, confirmation, final details, and the day itself. A single page per vendor, in a consistent format, keeps that arc visible and stops quotes from disappearing into your email. Copy this layout for each vendor: name, service, and contact person with phone and email; what is included, in the vendor’s own words; quote and payment terms, including deposit paid and balance due; key dates such as tasting and setup time; questions to ask, written before the call; and dated notes from each conversation.
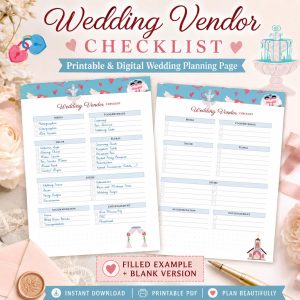
Keep a one-page comparison table at the front of the Vendors section: vendor, service, quote, deposit, and what is included. When two quotes look similar, the table usually reveals the real difference — one includes setup and cleanup, the other does not. And remember: a phone call is not a confirmation. After every important vendor conversation, send a short message restating what was agreed and save a note of it in GoodNotes.
Budget Tracking Without a Spreadsheet Headache
Event budgets fail in small increments: a slightly more expensive cake here, an extra table there, a last-minute hire nobody recorded. Set up the budget as a table with columns for category, item, estimated cost, quoted cost, deposit paid, balance due, and actual cost, and update it every time money moves. Record the estimate before you get the quote, and keep a 10% contingency line and treat it as spent: if it is still there at the end, it is a bonus.
For a wedding, the budget deserves its own focused tool. A wedding budget spreadsheet pairs well with a GoodNotes notebook: use the spreadsheet for the running totals and the notebook for the decisions behind each number. Note who pays what and when on the budget page itself — “Balance due on the day, Emma pays caterer by card” prevents an awkward conversation at 6 p.m. while guests are arriving.
The Day-Of Run Sheet
The run sheet is the single most valuable page in your notebook: a minute-by-minute plan for the day itself that replaces your memory entirely. Build it as a table with four columns: time, what happens, who is responsible, and notes. A typical run sheet runs from 08:00 venue access and vendor setup, through guest arrival and the ceremony or welcome, dinner and speeches, dancing, and a 23:00 last song, farewells, and pack-down.
Adapt the times to your event, but keep the structure: every block has a time, an action, and a named person. Print the run sheet the day before and share it with your coordinator, vendors, and helpers. On the day, keep it open on your iPad and tick each block off as it happens. Your day-of contact list belongs on the facing page: every vendor, the venue manager, the coordinator, and two emergency contacts, with phone numbers written out in full.
Checklists for Weddings, Birthdays, and Corporate Events
The same notebook structure works for every event, but the details change. Use these checklists as starting points and delete what does not apply — a shorter list you actually use beats a longer list you ignore.
Wedding checklist
- Venue, date, and guest count confirmed; deposits paid and recorded.
- Caterer, photographer, florist, and entertainment booked with written confirmations.
- Guest list finalised, invitations sent, RSVPs chased, and seating plan drawn.
- Music list, ceremony order, and speeches confirmed with everyone involved.
- Budget reviewed weekly; final balances and who pays them noted on the budget page.
- Day-of run sheet shared with the coordinator and all vendors.
Birthday checklist
- Theme, venue, and guest list decided; invitations sent with a clear RSVP date.
- Food and drink planned for the actual number attending, including dietary needs and children’s options.
- Cake ordered with the collection or delivery time written on the timeline.
- Decorations, music, and games prepared the day before, not the morning of.
- A simple run sheet: setup, guests arrive, food, cake and singing, games, farewells.
Corporate event checklist
- Objective written down first: what should attendees do, feel, or know afterwards?
- Venue, AV, and catering booked, with setup and pack-down times agreed in writing.
- Attendee list with roles, companies, and dietary needs; name badges prepared.
- Agenda with timings, speakers, and backups if a speaker cancels.
- Branding, signage, and handouts confirmed and delivered to the venue in advance.
- Run sheet shared with the venue, AV team, and helpers; one person owns the clock.
Common Mistakes to Avoid
Most event stress comes from a handful of avoidable mistakes: keeping the guest list in two places; confirming vendors by phone only; leaving the RSVP deadline too close to the caterer’s deadline; planning the day in your head instead of on the run sheet; forgetting the contingency; and doing everything yourself on the day instead of delegating. Fix them early, while they are still cheap.
Frequently Asked Questions
Can I plan a whole wedding in GoodNotes?
Yes, when you give it structure: one notebook, sections for the timeline, guest list, vendors, budget, and day-of plan, and a weekly review to keep everything current. For very large weddings, pair it with a spreadsheet for budget totals — but keep GoodNotes as the single source of truth for decisions and the day-of plan.
How do I share my event plan with vendors or a co-host?
Export the relevant pages as a PDF and send only those pages. Vendors usually need the run sheet and their own vendor page; a co-host needs the timeline, guest list, and budget. Sharing pages rather than the whole notebook keeps private notes and costs where they belong.
What is the best GoodNotes template for event planning?
A combination works best: checklist pages for the timeline and day-of plan, table pages for the guest list and budget, and blank pages for seating plans and floor sketches. If you already use a daily or life planner, start from that and add event sections, rather than building a separate system from scratch.
How far in advance should I start planning in GoodNotes?
For a wedding or a large corporate event, start twelve weeks out at minimum. For a birthday or a smaller gathering, four to six weeks is usually enough if you keep the final two weeks of the timeline intact. Whatever the size, create the notebook the day you decide to hold the event — even a half-empty notebook beats a perfect plan started too late.
Your Event, One Notebook, No Loose Ends
GoodNotes for event planning is not about having the prettiest notebook. It is about having one place you trust: a timeline that tells you what is due, a guest list that tells you who is coming, vendor pages that tell you what was agreed, a budget that tells you what is left, and a run sheet that tells everyone what happens next.
Start today. Create the notebook, add the sections, copy in the twelve-week timeline, and put the first three tasks on this week’s daily pages. The 2027 Life Planner gives you the dated pages to hold those tasks alongside the rest of your life — open it, set up your event notebook beside it, and plan your next event the calm way.
Temply Studio
Stop chasing your goals with sticky notes and scattered notebooks. Our premium digital planners and Canva templates are designed to help you plan with intention, stay consistent, and actually enjoy the process.


Questions about this guide?
Ask about the planner, share how you use it, or tell us what to cover next. Your email stays private.