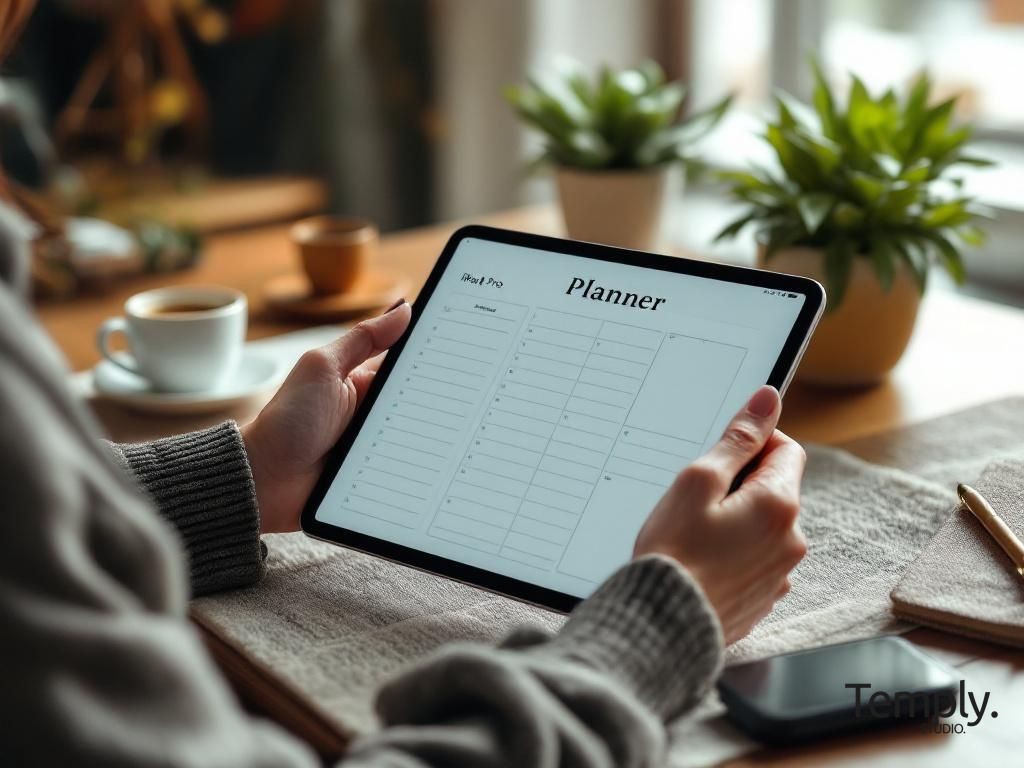
Choosing the right digital planner for iPad can feel like unlocking a new level of personal and professional organization. It’s more than just a notebook; it’s a dynamic system that adapts to your life, blending the tactile joy of planning with the powerful capabilities of your device. In 2026, the options for a digital planner for iPad are more sophisticated and beautiful than ever, offering endless customization to fit your unique workflow and aesthetic.
Why a Digital Planner for iPad is a Game-Changer
The shift from paper to digital planning isn’t just about saving trees; it’s a fundamental upgrade in how you manage information, time, and goals. A digital planner for iPad leverages the device’s native strengths—portability, processing power, and a brilliant display—to create a planning experience that is both intuitive and incredibly powerful. It solves the age-old problems of bulky binders, misplaced notes, and the frustration of wanting to reorganize your entire system without starting from scratch.
For creative entrepreneurs, students, and productivity enthusiasts, a digital planner for iPad becomes a central hub. It can hold your calendar, task lists, project notes, mood boards, and even financial trackers all in one, searchable, portable place. The ability to instantly duplicate pages, move elements around, and link between sections creates a fluidity that paper simply cannot match. This isn’t just a replacement; it’s an evolution of the planning ritual itself.
Unmatched Portability and Syncing
Your entire life’s organizational system fits into a device thinner than a traditional notebook. This is the core appeal of a digital planner for iPad. Whether you’re heading to a coffee shop, traveling for work, or simply moving from your desk to your couch, your planner is always with you and always up to date. With cloud syncing through services like iCloud, Dropbox, or Google Drive, any update you make on your iPad is instantly available on your iPhone or Mac.
This seamless ecosystem eliminates the “which notebook did I write that in?” dilemma. You can jot down a meeting note on your phone during a commute, and it will be waiting, formatted and ready, in your digital planner for iPad when you sit down to work. For professionals juggling multiple clients or projects, this constant, synchronized access is not just convenient—it’s critical for maintaining clarity and momentum without the mental load of transferring information between systems.
The portability extends beyond mere convenience. It encourages consistent use. When your planner is as easy to carry as your keys and wallet, you’re far more likely to reference it throughout the day, making it a true active tool rather than a static repository you only visit during a weekly review. This constant interaction is what turns planning from a chore into a natural, integrated part of your daily flow.
Endless Customization and Undo Function
Paper planning requires commitment. A misplaced pen stroke, a changed appointment, or a desire to restructure your weekly layout often means white-out, messy cross-outs, or starting a fresh page. A digital planner for iPad removes this friction entirely. The “undo” button is perhaps the most underrated feature in digital planning, granting you the freedom to experiment with layouts, colors, and notes without fear of making a permanent mistake.
Customization goes far beyond fixing errors. You can tailor every aspect of your digital planner for iPad to suit your current needs. Using tools within apps like GoodNotes or Notability, you can change paper styles (grid, dotted, lined, blank) on any page. You can create custom stickers, import images for vision boards, and use a vast color palette for your pens and highlighters. If a pre-made planner section isn’t working for you, you can hide it, duplicate it, or completely redesign it.
This flexibility means your planner grows with you. In January, you might focus on a detailed annual goal tracker. By March, you may realize a simple weekly habit tracker is more effective. With a digital planner for iPad, you can pivot instantly. You can have a section for business finances, one for personal journaling, and another for planning social media content—all in the same file, each with its own look and feel. This level of personalization ensures the tool works for you, not the other way around.
Choosing the Best App for Your Digital Planner for iPad
The app you choose is the engine that brings your digital planner for iPad to life. It determines how you interact with your planner, what features you have access to, and how smoothly the experience feels. In 2026, several standout applications have solidified their place as top contenders, each with a slightly different philosophy. Your choice will depend on whether you prioritize handwriting realism, robust text-based organization, or deep integration with other tools.
It’s worth downloading a few and experimenting with their free versions or basic features. Pay attention to how the pen feels, how intuitive the folder system is, and how quickly you can navigate between pages. The best app is the one that feels like an extension of your thought process, getting out of the way so you can focus on planning, not on figuring out the software.
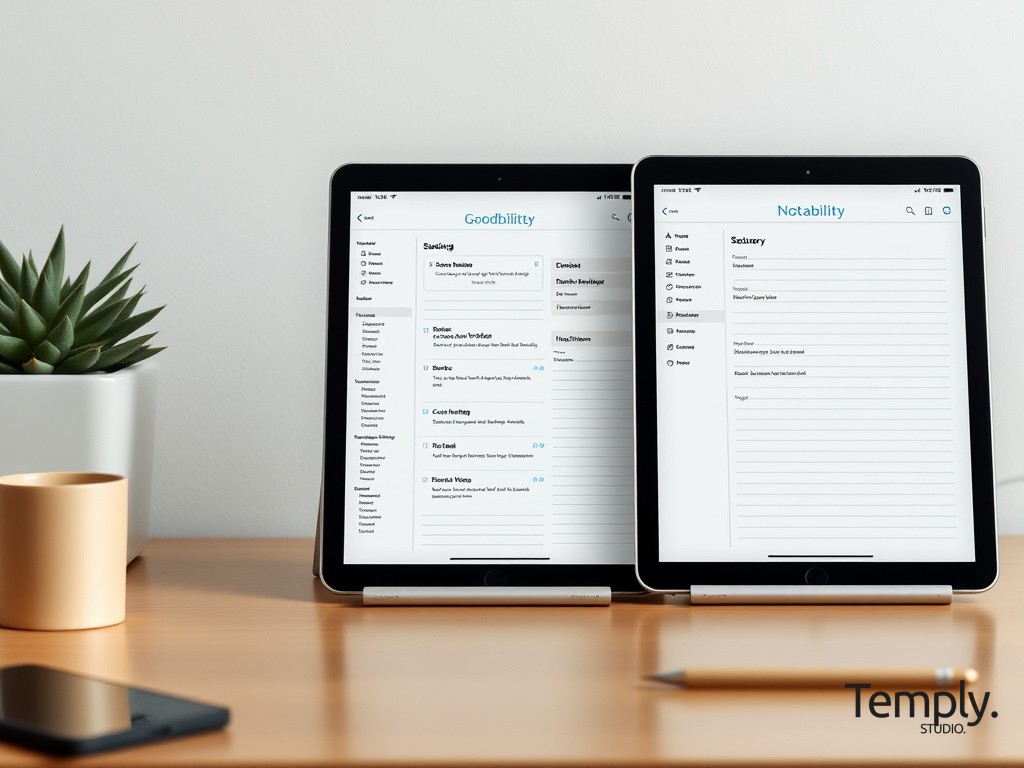
1. GoodNotes: The Handwriting Powerhouse

GoodNotes is often the first recommendation for anyone serious about using a digital planner for iPad, and for good reason. It has mastered the simulation of writing on paper. The app offers incredibly responsive and realistic pen tools, with options that mimic ballpoint pens, fountain pens, and brushes. The slight lag and texture feedback (especially when used with a paper-like screen protector) create an experience that is deeply satisfying for those who miss the physical act of writing.
Beyond writing, GoodNotes excels as a planner platform because of its superb file management. You can import any PDF digital planner for iPad and it becomes a fully interactive notebook. The app’s thumbnail view and outline feature (which lets you bookmark specific pages as chapters) make navigating even a 500-page planner effortless. Its search functionality is legendary—it can find handwritten text within your notes, a game-changer for retrieving information from weeks or months ago.
For the creative planner, GoodNotes offers robust shape recognition, a vast color picker, and the ability to import images and create custom stickers. You can lasso any element—text, a doodle, a photo—and move, resize, or copy it anywhere. This makes designing custom dashboard pages or rearranging weekly layouts a simple drag-and-drop affair. Its combination of powerful organization and best-in-class handwriting makes it the gold standard for a tactile, analog-feeling digital planner for iPad experience.
2. Notability: The Audio and Speed Champion
Notability takes a slightly different approach, positioning itself as the ultimate note-taking and planning app for those who value speed and multimedia integration. Its interface is clean and focused, with a continuous vertical scroll for notes instead of separate pages. This can be perfect for certain planning styles, like journaling or project brainstorming, where you want a long, uninterrupted canvas.
Where Notability truly shines—and why it’s a strong contender for your digital planner for iPad—is its audio recording feature. You can record meetings, lectures, or your own brainstorming sessions, and the app will sync your written notes with the audio timeline. Tap on a word you wrote, and it will jump to that moment in the recording. For students or professionals in client meetings, this feature is invaluable, ensuring you never miss a context-critical detail.
Notability also boasts excellent organization with dividers and subjects, and its typing tool is particularly polished, offering a wide range of fonts and formatting options. Its “favorites” toolbar is highly customizable, letting you keep your most-used pens, highlighters, and tools one tap away. If your planning involves a mix of rapid typed notes, handwritten annotations, and audio references, Notability provides a uniquely powerful and integrated workflow for your digital planner for iPad.
3. Noteshelf: The Balanced All-Rounder
Noteshelf often flies under the radar but deserves serious consideration for your digital planner for iPad setup. It strikes a elegant balance between the handwriting beauty of GoodNotes and the streamlined functionality of Notability. Its pen engine is exceptionally smooth and offers a wide variety of customizable pens, including a calligraphy pen that responds beautifully to pressure and tilt.
One of Noteshelf’s standout features for planning is its built-in template gallery. While you can import any PDF planner, Noteshelf also lets you create notebooks from scratch using a variety of built-in page templates—planners, to-do lists, grids, music sheets, and more. This is perfect for someone who wants to build a hybrid system, using a pre-made digital planner for iPad for core structure but creating custom ad-hoc pages for specific projects on the fly.
Noteshelf also includes a unique “audio notes” feature similar to Notability and has robust search capabilities for both typed and handwritten text. Its interface is intuitive and visually appealing. For the planner who wants a premium, polished experience without having to choose between top-tier handwriting and smart features, Noteshelf is an excellent and often overlooked home for your digital planner for iPad.
The 7 Best Ultimate Benefits of Using a Digital Planner for iPad
Adopting a digital planner for iPad offers a cascade of advantages that compound over time, fundamentally improving how you organize your time, track your goals, and express your creativity. These benefits go far beyond simple convenience, touching on cost savings, psychological clarity, and environmental impact. Let’s explore the seven most impactful reasons to make the switch in 2026.
1. Infinite Space Without the Bulk
The most immediate benefit of a digital planner for iPad is the liberation from physical constraints. A traditional planner has a fixed number of pages. When you run out, you need a new one, often abandoning half-used sections or struggling to migrate important information. A digital planner for iPad offers effectively infinite space. You can duplicate weekly layouts endlessly, add new project sections with a few taps, and create as many custom collections as you need without ever worrying about adding weight to your bag.
This infinite capacity encourages more thorough planning and journaling. You’re not subconsciously rationing page space. You can brain dump freely, create elaborate mind maps, or paste dozens of inspiration images for a vision board. This expansiveness fosters a more complete and detailed record of your life and work. Furthermore, you can archive old years or completed projects within the same app, keeping them accessible for reference but out of your active view, maintaining a clean and current workspace.
The organizational power this unlocks is profound. Imagine having a single, searchable repository that contains your 2024 annual review, your 2025 business plan, and your active 2026 weekly spreads—all linked and cross-referenced. This creates a living history of your progress and decisions, a resource that becomes more valuable with each passing year. The digital planner for iPad isn’t just for today; it’s a lifelong system.
2. Powerful Search and Instant Retrieval
This benefit alone can save you hours of frustration. How many times have you vaguely remembered writing down a recipe, a contact detail, or a project idea, only to spend 20 minutes flipping through old notebooks? A digital planner for iPad, especially when used with apps like GoodNotes, makes every word you write—even by hand—searchable. You can type “Q3 budget” or “Sarah’s email” into the search bar and instantly jump to the exact page where that information lives.
This transforms your planner from a passive record into an active knowledge base. It encourages you to put *everything* in one place, knowing you can find it later. Meeting notes, book summaries, gift ideas, vacation plans—all become part of a searchable personal database. The time and mental energy you reclaim by not hunting for information is significant, reducing cognitive load and freeing up bandwidth for more important creative or strategic thinking.
The search functionality extends beyond text. You can also search for specific shapes or diagrams if you consistently use certain symbols (like a star for important tasks). By combining this with a thoughtful tagging or bookmarking system within your digital planner for iPad, you create a personal Google for your life. The efficiency gained here is a massive competitive advantage, both personally and professionally.
3. Unbeatable Cost-Effectiveness Over Time
While there is an initial investment in a quality iPad and a stylus like the Apple Pencil, the long-term savings are substantial. Consider the annual cost of paper planners. A premium paper planner can easily cost $50-$100. Add in the cost of specialty pens, highlighters, stickers, and washi tape, and many enthusiasts spend over $150 per year. Over five years, that’s $750 or more.
A digital planner for iPad flips this model. After purchasing a planner PDF (which often costs between $15-$40), you own it forever. You can reuse it year after year by simply duplicating the file or using a dated version from the creator. The “accessories”—pens, highlighters, stickers—are all digital, included in the app or available as one-time-purchase bundles for a fraction of their physical counterparts. A $20 sticker pack for a digital planner for iPad might contain 500 unique elements, whereas a physical pack for a paper planner might have 50 for the same price.
This cost-effectiveness also applies to experimentation. In a paper system, trying a new layout or planning style often means buying a whole new book. With a digital planner for iPad, you can test a minimalist layout one week and a detailed, color-coded spread the next, all within the same file and at zero additional cost. This freedom encourages you to refine your system until it’s perfectly tailored to you, without financial guilt.
4. Eco-Friendly and Sustainable Planning
For the environmentally conscious, a digital planner for iPad is a clear choice. The paper industry is a significant contributor to deforestation, water consumption, and carbon emissions. By moving your planning digital, you eliminate your personal contribution to that waste stream. No more throwing away half-used notebooks or outdated planners at the end of the year.
The sustainability argument extends beyond paper. You also eliminate the production and disposal of plastic packaging from pens, sticker sheets, and other planning accessories. A single Apple Pencil, responsibly used for years, replaces hundreds of disposable plastic pens. This shift aligns planning with a values-driven, minimalist lifestyle. It’s a small but meaningful way to reduce your environmental footprint while pursuing your goals.
Furthermore, the cloud-based nature of a digital planner for iPad means your important information is preserved digitally, safe from physical damage like spills, fires, or simple wear and tear. This contributes to a different kind of sustainability—the preservation of your personal data and memories over a lifetime, without the degradation that physical paper inevitably faces.
5. Seamless Integration of Media and Links
A paper planner is limited to ink, pencil, and the occasional glued-in photo. A digital planner for iPad is a multimedia hub. You can seamlessly integrate screenshots, photos from your camera roll, website links, and even audio clips directly into your pages. Planning a home renovation? Paste inspiration photos from Pinterest directly onto your project spread. Preparing for a presentation? Insert a screenshot of a key graph and annotate it right there.
The hyperlinking capability is a game-changer for productivity. In apps like GoodNotes, you can create clickable links between pages. You can set up a master index page where clicking on “January Budget” jumps directly to that sheet. In a project plan, you can link a task to the detailed research notes behind it. This creates a web of connected information, mimicking how our brains actually associate ideas, making your digital planner for iPad a true extension of your thinking.
This integration makes the planner a central command center. Instead of having your calendar in one app, your notes in another, and your inspiration in a third, you can bring key elements from all of them into a unified, contextual view. You can take a screenshot of your weekly Notion dashboard and annotate it, or paste a link to a crucial Google Doc. This breaks down app silos and creates a holistic planning environment.
6. Effortless Editing and Future-Proofing
Mistakes and changes are a natural part of life and planning. In a paper planner, a changed appointment or a misspelled word can ruin the aesthetics of a page and cause frustration. The “undo” button in a digital planner for iPad is a powerful psychological tool, granting permission to experiment and edit freely. You can try out a new color scheme for your weekly tasks and revert it in seconds if it doesn’t work.
This extends to major structural changes. If you realize your current planner’s daily layout isn’t working, you don’t have to abandon the whole book. You can find or create a new layout page and simply replace the old ones, or add the new design as an additional section. Your digital planner for iPad is a living document that evolves as you do. You can future-proof your system by always having the ability to adapt it to new life circumstances, jobs, or goals without starting from zero.
Editing also includes easy duplication. Need another copy of a cleaning checklist? A duplicate page is two taps away. Want to use the same meeting notes template for ten different clients? Create it once and copy it endlessly. This efficiency eliminates repetitive drawing and setup, letting you focus on the content—the actual planning and thinking—rather than the manual labor of recreating formats.
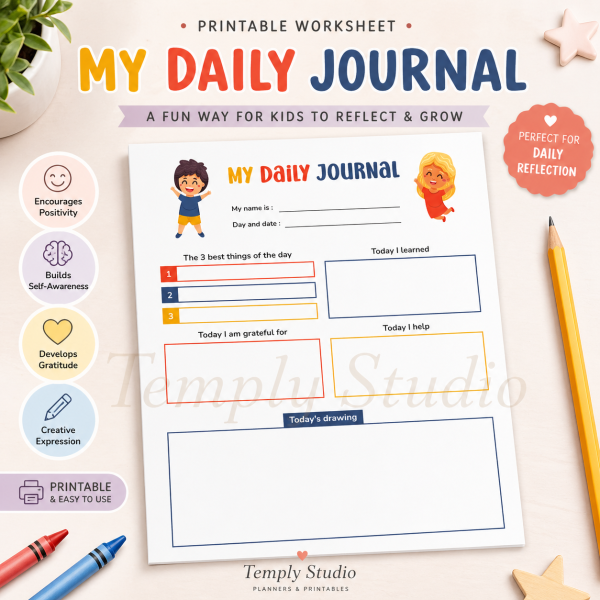
7. A Catalyst for Creativity and Personal Expression
Finally, a digital planner for iPad can be an incredible outlet for creativity. The tools available—endless color palettes, custom stickers, imported images, and various drawing tools—allow you to create pages that are not only functional but also beautiful and personally meaningful. The act of decorating and designing your planner can be a relaxing, meditative practice that increases your engagement with the tool.
This creative expression has practical benefits. A planner you find visually appealing is one you’ll want to open and use consistently. The time spent customizing it creates a sense of ownership and investment, making you more likely to follow through on the plans and goals within it. You can match your digital planner for iPad to your mood, the season, or your brand colors, making it a true reflection of your identity.
For creative professionals, this blends work and tool seamlessly. A graphic designer can use their planner to sketch logo ideas alongside their client meeting notes. A writer can storyboard a blog post in one section and track its publication schedule in another. The digital planner for iPad becomes a sandbox for both logistical management and creative exploration, proving that productivity and artistry are not mutually exclusive.
How to Set Up Your First Digital Planner for iPad: A Step-by-Step Guide
Getting started with a digital planner for iPad can feel overwhelming with so many options. This step-by-step guide will walk you through the process from app selection to your first perfectly customized weekly spread. Follow these steps to build a foundation that is both powerful and personally resonant, setting you up for a successful planning journey in 2026 and beyond.
The key is to start simple. Don’t try to implement every possible feature on day one. Choose a core structure, learn the basic tools, and allow your system to evolve naturally as you discover what you need. Your first setup should be functional and encouraging, not complex and daunting.
Step 1: Acquire Your Planner PDF
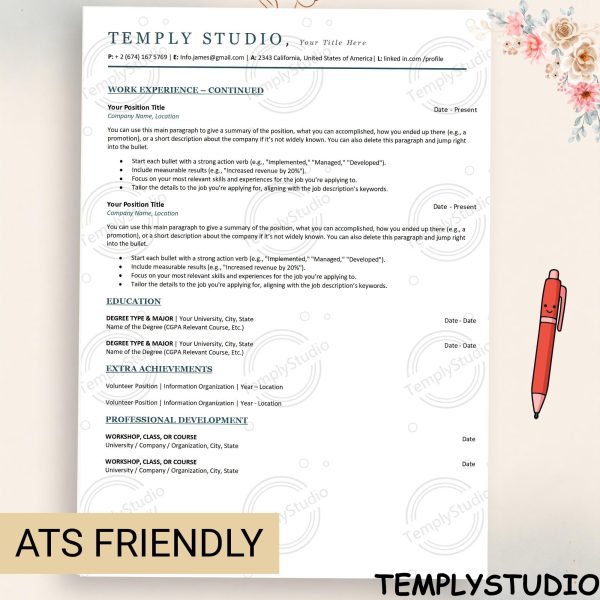
Your first decision is the planner PDF itself. This is the template that defines the structure—the calendars, weekly spreads, trackers, and lists. You can find a vast array of digital planners for iPad online, from minimalist designs to elaborate, hyperlinked creations. Look for a design that resonates with your aesthetic and includes the core pages you know you’ll use: a yearly overview, monthly calendars, and weekly/daily pages.
Many creators, including Temply Studio, offer beautiful and functional designs. Consider starting with a classic, clean template that provides a strong foundation. You can always add decorative elements later. Once purchased, download the PDF file to your iPad. It will typically be in your “Files” app or directly in your email downloads. Ensure you download any accessory files, like sticker books or instruction guides, that come with it.
Pro Tip: Look for planners described as “hyperlinked.” These have clickable tabs and buttons that navigate between sections, mimicking the experience of a physical binder with tabs. This greatly enhances the usability of a larger digital planner for iPad.
Step 2: Import and Open in Your Chosen App
Navigate to your downloaded PDF file in the Files app. Tap the share icon (the square with an arrow pointing up) and select “Open in…” your chosen planning app (e.g., GoodNotes). The app will import the PDF and create a new notebook from it. You may be prompted to choose a cover or name the notebook—choose something clear, like “My 2026 Planner.”
Take a few moments to explore the imported planner. Swipe through the pages, tap on any visible links to see how navigation works, and get a feel for the layout. Don’t worry about filling anything out yet. This exploration phase is crucial for understanding how the creator has organized the information. Familiarize yourself with the location of the index, the monthly tabs, and the weekly sections.
At this stage, you might also want to duplicate the entire notebook file within your app. This gives you a pristine backup copy. You can then fearlessly experiment with your working copy, knowing you can always revert to the original if needed.
Step 3: Customize Your Toolbar and Master the Basics
Before you write a single word, set up your tools for efficiency. Open your app’s pen/brush settings. Most apps let you save favorite pen styles. Create a few: a fine pen for writing (black or dark gray), a medium highlighter in a soft color (like pastel yellow or blue), and a thicker pen for headers or doodling. Save these to your quick-access toolbar.
Practice the core gestures: writing, erasing, lassoing, and zooming. The zoom window (a magnified box that follows your pen) is essential for detailed writing. Get comfortable with the lasso tool—it’s your key to moving text, images, and stickers around. Also, locate the undo/redo buttons; they will be your best friends. Spend 15 minutes in a blank page just playing with these tools. This muscle memory will make the actual planning experience fluid and enjoyable.
Finally, explore the app’s settings for things like palm rejection (critical for comfortable writing), default page orientation, and auto-backup to your preferred cloud service. A well-configured app is the bedrock of a stress-free digital planner for iPad experience.
Must-Have Accessories to Elevate Your Digital Planner for iPad
While the iPad and app are the core, a few key accessories can dramatically improve the comfort, precision, and enjoyment of using your digital planner for iPad. These tools bridge the gap between the digital interface and the tactile, human experience of planning, making the process more intuitive and less fatiguing over long sessions.
Investing in one or two of these accessories is often the difference between using your planner occasionally and having it become a seamless, daily habit. They solve common pain points like hand slippage, screen glare, and stylus battery life, allowing you to focus entirely on your content.
The Apple Pencil (2nd Generation)
The Apple Pencil is the undisputed champion for interacting with a digital planner for iPad. The second-generation model, with its magnetic wireless charging and pairing, is a flawless companion. Its pressure and tilt sensitivity make handwriting feel natural and expressive, allowing for thin upstrokes and thick downstrokes just like a real pencil. The double-tap feature on the barrel can be customized to quickly switch between tools, like from a pen to an eraser, which is a huge time-saver during active planning sessions.
Beyond functionality, it eliminates lag, making the writing experience instantaneous. This is critical for maintaining the flow of your thoughts. For anyone serious about using their iPad as a planning and note-taking device, the Apple Pencil is not an accessory; it’s an essential component of the system. Its precision is also perfect for detailed doodling, creating custom stickers, or editing small elements on your planner pages.
A Paper-Like Screen Protector
This is a game-changer for the writing feel. A matte, paper-like screen protector adds a slight texture to the iPad’s glass surface. This provides grip for the Apple Pencil tip, mimicking the friction of paper. It reduces the slippery, glassy feeling that can make handwriting difficult to control and reduces annoying screen glare from overhead lights, which is a common issue when trying to use a digital planner for iPad in brightly lit offices or cafes.
The trade-off is a very slight reduction in screen clarity (a mild “grainy” effect), but most users find the trade-off overwhelmingly worth it for the vastly improved writing experience. It also helps prevent fingerprints and smudges. When applying one, ensure you follow the instructions carefully to avoid bubbles, and consider buying a multi-pack, as the texture can wear down the Apple Pencil tip slightly faster (though replacement tips are inexpensive).
A Functional and Protective Case
A good case does more than protect your investment; it improves usability. Look for a case with a stable, adjustable stand. This allows you to set your iPad at a comfortable writing angle, whether at a desk or on your lap, preventing neck and wrist strain during long planning sessions. Many “folio” style cases also include a slot to store and transport your Apple Pencil, ensuring it’s always paired and charged when you need it.
For the ultimate planning setup, some users opt for a case that doubles as a stand combined with a separate, detachable Bluetooth keyboard for times when they need to type longer notes quickly. This transforms your digital planner for iPad from a pure handwriting device into a versatile hybrid workstation, ready for any task from journaling to drafting emails.
Creating a Weekly Routine with Your Digital Planner for iPad
A planner is only as good as the routine that supports it. Integrating your digital planner for iPad into your daily and weekly rhythm is what turns it from a novelty into a indispensable life management system. This routine doesn’t need to be lengthy or complex; it needs to be consistent and meaningful. Here’s a proven framework for a weekly planning ritual that leverages the unique strengths of your digital tool.
The goal is to create touchpoints throughout the week that keep you aligned with your priorities, responsive to changes, and reflective on your progress. This routine ensures your planner is a living, breathing guide, not a forgotten archive.
The Sunday Evening Setup (15-20 Minutes)
Dedicate a quiet 15-20 minutes on Sunday evening to prepare for the week ahead. Open your digital planner for iPad and navigate to your weekly spread. First, review the past week’s spread. What tasks were completed? What was migrated? Use a digital highlighter to mark accomplishments. This provides a sense of closure and progress.
Next, look at the upcoming week’s monthly calendar page. Transfer any appointments, deadlines, or events from your monthly view onto your weekly spread. Then, consult your master task list or project pages. Decide on 3-5 critical priorities for the week and write them in a prominent spot on your weekly page. Finally, add any routine tasks, personal errands, or habits you want to track. This process ensures you start Monday with clarity, not confusion, because your digital planner for iPad has already done the heavy lifting of organization.
The Daily Morning Review (5 Minutes)
Each morning, open your digital planner for iPad to the current day. Quickly scan your weekly priorities and the specific tasks you assigned for today. Use this moment to mentally sequence your day. What’s the one thing you must accomplish? You can use the lasso tool to star it or write it at the very top of your daily space. This brief morning ritual sets your intention and directs your focus, preventing the day from being hijacked by reactive demands.
This is also a great time to check any time-specific alerts you may have set elsewhere (like in your native Calendar app) and jot them down in your planner’s timeline if you use one. The act of writing them, even digitally, reinforces them in your memory.
The Friday Afternoon Review & Archive (10 Minutes)
At the end of your work week, take 10 minutes for a review. Look at your completed weekly spread. What went well? What didn’t get done and why? Be honest with yourself. For migrated tasks, decide if they are still important for next week or should be deleted. This reflective practice is key to continuous improvement in your personal productivity system.
You can also use this time to add any relevant notes, receipts, or screenscreenshots to a “Week in Review” page you might have in your digital planner for iPad. Once you’re satisfied, you can “close” the week by adding a final checkmark or a small decorative element. Some people even take a screenshot of their completed weekly spread and store it in a separate “Accomplishments” album. This creates a visual record of your productivity that can be incredibly motivating to look back on.
Advanced Tips and Tricks for Power Users
Once you’re comfortable with the basics of your digital planner for iPad, you can unlock even greater efficiency and functionality with these advanced techniques. These tips leverage the deeper features of planning apps and creative workarounds to solve complex organizational challenges, transforming your planner into a sophisticated personal operating system.
Creating Custom Templates and Stickers
Don’t limit yourself to the pages in your purchased planner. You can create your own. Use a tool like Canva to design a custom project tracker, meeting notes page, or habit log that perfectly fits your needs. Export it as a PDF or image. In GoodNotes, you can set any PDF as a “template” to be used for new pages. This means you can have a library of your own designs ready to insert anywhere in your digital planner for iPad.
For stickers, create them in Canva or Procreate. Design simple icons, motivational phrases, or functional labels. Save them as PNG files with transparent backgrounds. Import them into your planning app and use the lasso tool to copy and paste them wherever you like. You can even create a “sticker book” page within your planner where you store all your custom elements for easy access. This level of customization makes your system truly one-of-a-kind.
Using Shapes and Layers for Clean Design
Most planning apps have a shape tool that draws perfect lines, circles, squares, and triangles. Use this to create clean dividers, checkboxes, or highlight areas on your page without any wobble. Combine this with the layering functionality (usually accessed by selecting an element and choosing “Arrange” to send it backward or bring it forward).
For example, you can place a transparent shape behind a block of text to create a subtle colored background, ensuring the text remains on top and readable. You can layer stickers behind handwritten text to create a watermark effect. Mastering layers allows you to build complex, beautiful pages that are still perfectly functional, elevating the aesthetic of your entire digital planner for iPad.
Conclusion: Your Journey Starts Now
Embracing a digital planner for iPad is more than adopting a new tool; it’s committing to a more organized, intentional, and creative way of managing your life and work. The benefits—from infinite space and powerful search to cost savings and environmental friendliness—create a compelling case for making the switch in 2026. The flexibility it offers ensures that your system can evolve as your needs do, growing with you through career changes, personal projects, and new goals.
The key is to start. Choose an app, find a planner design that speaks to you, and begin with the simple weekly routine. Allow yourself to experiment and make it your own. Remember, the most perfect planner is the one you actually use consistently. If you’re looking for a beautiful starting point, explore the collection of hyperlinked, aesthetic digital planners and Canva templates at Temply Studio. They are designed to provide that perfect blend of form and function, giving you a stunning foundation upon which to build your ultimate digital planner for iPad system. Your most productive and creative year is waiting to be planned.
Frequently Asked Questions (FAQ)
What is the best app for a digital planner for iPad?
The “best” app depends on your primary need. For the most realistic handwriting and superb PDF management, GoodNotes is the top choice. For integrated audio recording and continuous scrolling, Notability excels. For a balanced, elegant experience with great built-in templates, consider Noteshelf. We recommend trying the free versions of each to see which workflow feels most natural to you.
Can I use the same digital planner for iPad year after year?
Absolutely! This is one of the major advantages. If you purchase an undated planner, you can reuse it indefinitely. For dated planners, many creators provide free annual updates, or you can manually update the dates yourself in an app like Canva. This makes a digital planner for iPad a highly cost-effective, one-time purchase.
Do I need an Apple Pencil to use a digital planner for iPad?
While you can type and tap with your finger, an Apple Pencil (or a quality third-party stylus with palm rejection) is highly recommended for the full experience. Handwriting, drawing, and precise editing are core to the flexibility of a digital planner for iPad, and a stylus makes these actions comfortable and accurate.
How do I back up my digital planner for iPad?
Most planning apps (GoodNotes, Notability) have automatic backup settings. You can set them to back up your entire notebook library to cloud services like iCloud, Google Drive, or Dropbox as PDF files. This ensures your data is safe even if something happens to your iPad. It’s a critical step to set up when you first start. For more on protecting your digital creations, see our guide on organizing digital files.
Temply Studio
Stop chasing your goals with sticky notes and scattered notebooks. Our premium digital planners and Canva templates are designed to help you plan with intention, stay consistent, and actually enjoy the process.