


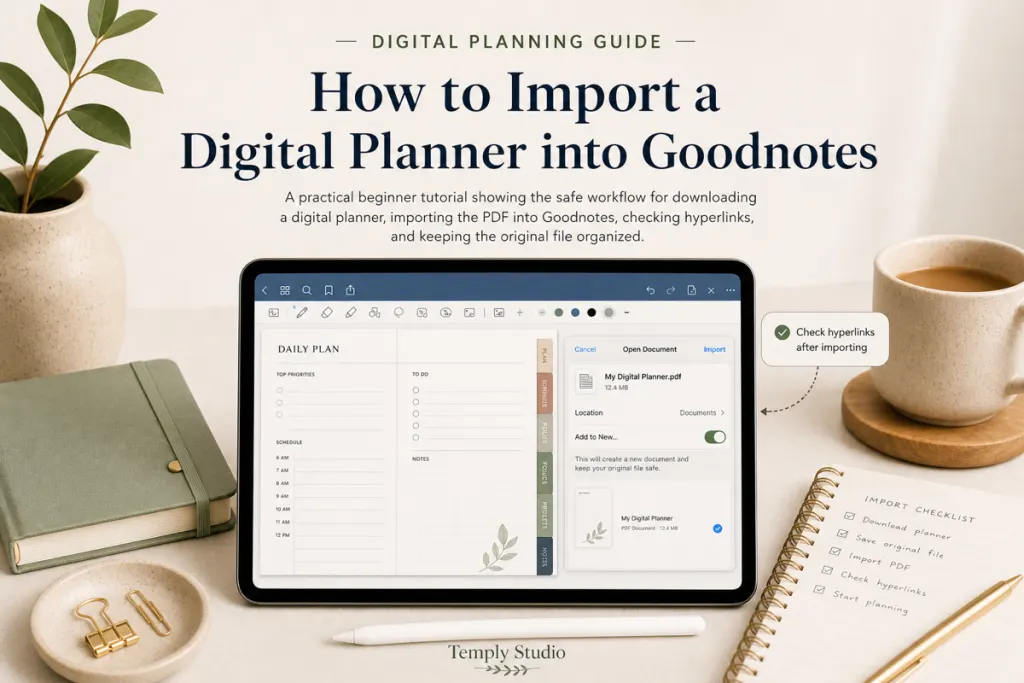
Quick answer: if you are learning how to import a digital planner into Goodnotes, first locate the planner PDF, keep an untouched copy, then open the Goodnotes Library and choose New > Import. Select the PDF and open it as a new document. Before adding handwriting or stickers, check several pages and test any navigation links that matter to your workflow.
This guide focuses on the current PDF workflow for Goodnotes. The exact controls can vary by platform and app version, so when a menu looks different, use the current Goodnotes help instructions for your device rather than forcing an outdated sequence.
What you need before you import a digital planner
- The digital planner file you intend to use, usually a PDF.
- Goodnotes installed on the device or platform where you plan to use the planner.
- Access to the folder or app where the download is stored.
- A safe location for the untouched original file.
Goodnotes currently lists PDF as a supported import format on iOS, Android, Windows, and Web. On iOS and iPadOS it also supports several additional formats, but Word and PowerPoint files are converted and may not preserve their original layout perfectly. For a planner supplied as a finished PDF, importing the PDF avoids that extra conversion step. See the current Goodnotes import documentation for supported formats and platform-specific limits.
If your download is an archive or contains several files, do not assume the first file you see is the planner. Check the supplied instructions, identify the intended PDF, and keep the original delivery somewhere you can find again.
How to import a digital planner into Goodnotes in 3 easy steps
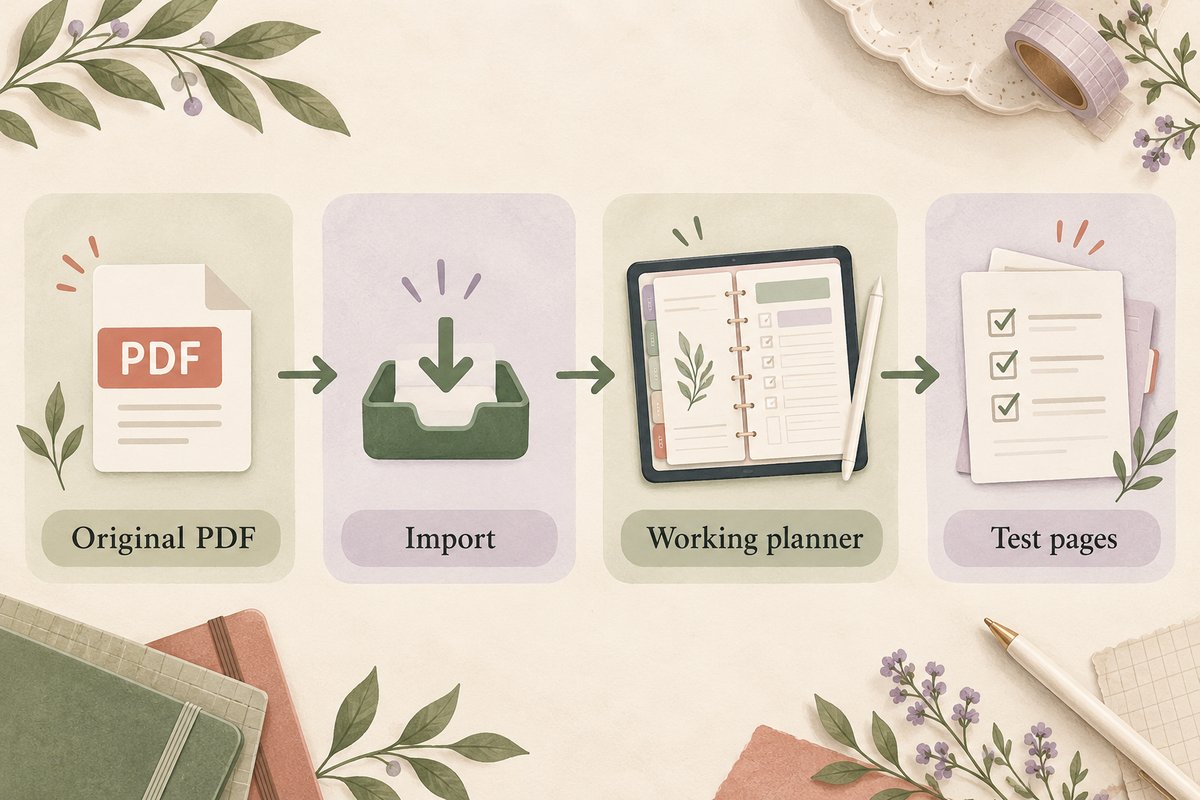
1. Locate the planner PDF
On iPad or iPhone, the file may be in Downloads, iCloud Drive, On My iPad, or another location visible through the Files app. If you downloaded the planner from a browser, email, cloud-storage app, or store, confirm the filename before you import it.
A simple folder structure helps later. You might keep the original delivery in one folder and the working planner in another. If you are setting up your first iPad planning workflow, the digital planner for iPad guide covers the broader device, Files, backup, and planning setup.
2. Import the PDF from the Goodnotes Library
Open Goodnotes and return to the Library or Documents view. Goodnotes currently documents the in-app route as New > Import. Choose the planner PDF from the file picker and tap Open. The file will be imported as a new document.
Importing the planner as a new document is usually the clearest starting point because it keeps the planner separate from existing notebooks. Goodnotes can also import files into an existing document, but that workflow is better when you intentionally want to insert pages into something you already use.
3. Wait for the import to finish and check the document
Open the imported planner and review several pages before you begin writing. Confirm that the page sequence looks right, text is readable, and the document you imported is the full planner rather than a preview image or instruction file.
This check matters because a successful import only proves that Goodnotes opened the file. It does not prove that every page, hyperlink, or planner feature works the way you expect.
Choose the right destination before importing
A full planner and a single insert need different destinations. For example, if you bought a new yearly planner, create a separate document so its index and page order remain easy to check. If you only downloaded an extra reading log, you may prefer to add it to an existing notebook. Confirm the destination before importing a large bundle.
When someone asks how to import a digital planner into Goodnotes without mixing it with their notes, start with the new-document route above. Give the copy a clear name immediately. If an older working planner already contains handwriting, leave it intact while you check the new file.
Alternative: import from Files or another app
On iOS, Goodnotes also documents importing from an external app. Open or select the file in the source app, use its Share or Open In command, choose Goodnotes, then select the New Document destination when you want the planner to remain separate.
This can be convenient when you have just downloaded the planner and already have the PDF open. The available share-sheet wording depends on the source app and operating-system version, so use the current option that sends or opens the file in Goodnotes.
Alternative: drag and drop on iPad
Goodnotes supports drag and drop on iOS/iPadOS. With Goodnotes and Files open side by side, locate the PDF in Files, press and hold it, then drag it into the intended Goodnotes folder or document area. Goodnotes also supports dragging multiple selected files when the source app allows it.
Drag and drop is useful when organizing several documents, but the same verification rule applies: open the imported planner and check the result before adding important notes.
Test your planner hyperlinks after import
Many digital planners use PDF hyperlinks for tabs, indexes, months, weeks, daily pages, notes, or return buttons. Goodnotes can open hyperlinks in imported PDFs, but the hyperlink must already exist in the PDF. Importing the file does not create missing navigation automatically.
The current Goodnotes guidance explains that hyperlink interaction differs by device. On Android, Windows, and Web, Read Only Mode is the documented route for selecting links. On supported Apple workflows, link interaction can also be available by selecting or pressing and holding the linked element and choosing Open Link. See the current Goodnotes imported-PDF hyperlink guide for the exact interaction on your platform.
Test a small set of representative links before you start planning: for example, the index, one month tab, one weekly or daily link, and a return link if the planner includes one. If you need more help with navigation, use Temply Studio’s Goodnotes planner hyperlink guide.
A quick navigation check
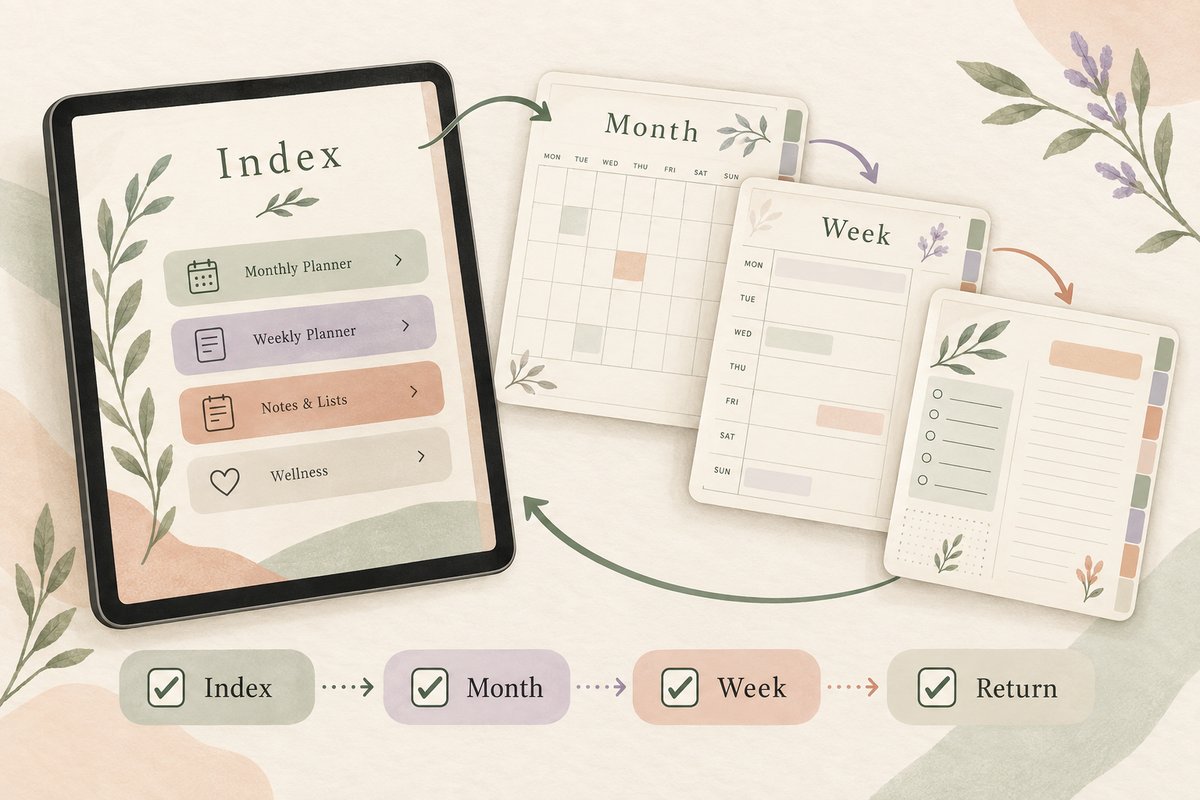
- Index: select a section and confirm the expected page opens.
- Month: try a tab away from the first page.
- Week or day: check one dated destination against its label.
- Return: test any home or back-to-index control supplied in the PDF.
This is a sample check, not a guarantee that every link works. If your planner has unusual sections, test those too. Note the page and label of a failed link so you can describe the problem accurately without sharing personal annotations.
If a hyperlink does not work
Start by checking the source PDF. Goodnotes recommends testing the same link in another PDF viewer. If the link also fails there, the source PDF may not contain a working hyperlink. If the link works in another PDF viewer but not in Goodnotes, follow the current Goodnotes troubleshooting steps or contact Goodnotes support with the affected file and the steps you tested.
Do not assume that a visual tab is automatically interactive. A PDF can look like a hyperlinked planner even when a specific element is only decorative.
Can you import a planner into an existing Goodnotes document?
Yes. Goodnotes documents a separate workflow for adding files to an existing document. Open the destination document, move to the page before or after the intended insertion point, use the Add Page control, choose Import, and select the file. External-app and drag-and-drop workflows can also insert files into an existing document on supported iOS setups.
For a complete digital planner, starting with a new document is often easier to manage. Use the existing-document workflow when you deliberately want to add inserts, reference pages, worksheets, or another PDF to a notebook you already use.
Keep the original PDF after importing
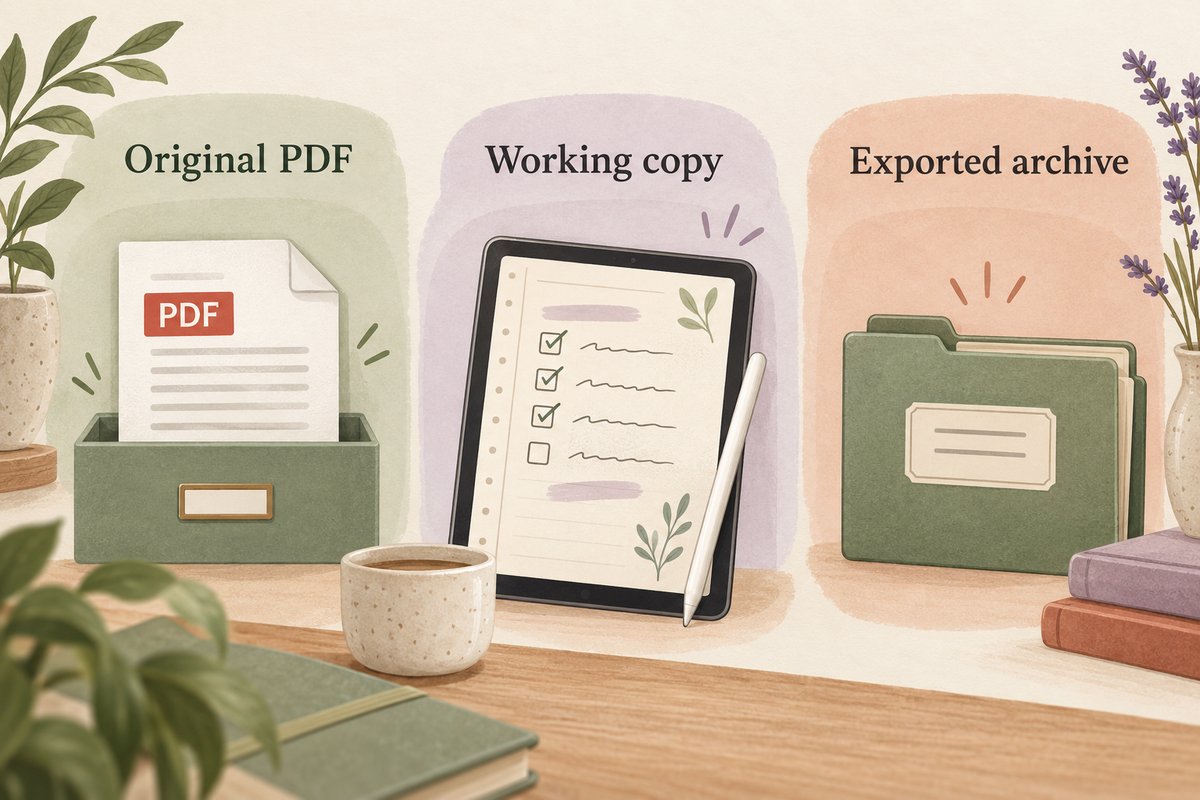
Do not make the imported Goodnotes document your only copy of the planner. Keep the original delivery in a folder you control. A clean source file is useful if you later need to re-import the planner, compare a working copy with the original, or troubleshoot a file that has been heavily annotated.
For a more complete file routine, see the digital planner backup and file organization guide. It covers separating source files from working copies and exported archives.
Organize the planner after import
Once the planner opens correctly, give the working document a clear name and place it in a folder that matches the way you use Goodnotes. For example, you might separate current planners, work notebooks, study documents, and archived years.
A clear name is more useful than a download filename such as planner-final-v4.pdf. Something like 2026 Digital Planner or Work Planner 2026 is easier to recognize in a growing library.
Common digital planner import problems
The file is a ZIP or contains several files
Check the product instructions and identify the intended planner file. Some downloads bundle PDFs, instructions, covers, or other resources together. Do not import a preview or instruction sheet by mistake simply because it appears first in the folder.
The file is greyed out or cannot be selected
Confirm that the download is complete and that the file type is supported on your current Goodnotes platform. If the file is stored in a cloud service, make sure it is actually available to the device rather than only shown as a remote placeholder. Goodnotes maintains current import troubleshooting in its help center.
The planner opens but looks wrong
Return to the untouched PDF and open it in another PDF viewer. If the source file already looks wrong there, re-importing it will not repair the source. If the source looks correct outside Goodnotes, compare the current Goodnotes import guidance and retry with a clean copy.
The planner tabs do not navigate
Confirm that you imported the complete PDF, then test the same link outside Goodnotes. If the source link works, review the current hyperlink interaction for your platform. If the source link does not work anywhere, the issue is in the PDF rather than the import command.
You imported the planner into the wrong document
Before adding annotations, move or re-import the file into the intended location. Keeping a clean original makes this easy. When importing from another app, pay attention to whether Goodnotes is offering a new-document destination or the current document.
What to do after a successful import
- Test the pages and links you use most often.
- Rename the working planner clearly.
- Keep the untouched original outside the working document.
- Decide how you will back up important annotations and exports.
- Check privacy before sharing screenshots or exported pages.
After the planner is imported, see the beginner Goodnotes planning workflow for daily and weekly setup.
When you need to create a portable copy later, follow the Goodnotes planner PDF export guide and verify the exported file after saving it.
Frequently asked questions
How to import a digital planner into Goodnotes without overwriting notes?
Import the clean PDF as a new document and use a different name. Check the new copy before moving anything. A fresh import will not recreate handwriting that exists only in an older working document, so keep and back up that document separately.
What file should I import into Goodnotes for a digital planner?
If the planner is supplied as a finished PDF, import that PDF unless the product instructions specify a different workflow. Goodnotes currently supports PDF import across iOS, Android, Windows, and Web.
Should I import the planner as a new document?
For a complete planner, a new document is usually the cleanest starting point. Import into an existing document only when you intentionally want to insert pages or another file into a notebook you already use.
Can Goodnotes open planner hyperlinks?
Yes, when the imported PDF already contains working hyperlinks. The way you activate a link varies by platform and interaction mode, so follow the current Goodnotes hyperlink instructions for your device.
Can I import the same planner again?
You can import a clean source PDF again when needed. Keep document names clear so you do not confuse the new copy with a planner that already contains notes.
Start with a clean PDF and test before you plan
The safest workflow is simple: locate the intended PDF, keep the original, import it as a new Goodnotes document, and test the pages and navigation before adding important notes. That small check separates file problems from app problems and makes troubleshooting much easier.
If you are still choosing a planner, browse the Temply Studio digital planner collection and review the current file details on the individual product page before purchasing or downloading.
Temply Studio
Stop chasing your goals with sticky notes and scattered notebooks. Our premium digital planners and Canva templates are designed to help you plan with intention, stay consistent, and actually enjoy the process.


Questions about this guide?
Ask about the planner, share how you use it, or tell us what to cover next. Your email stays private.