
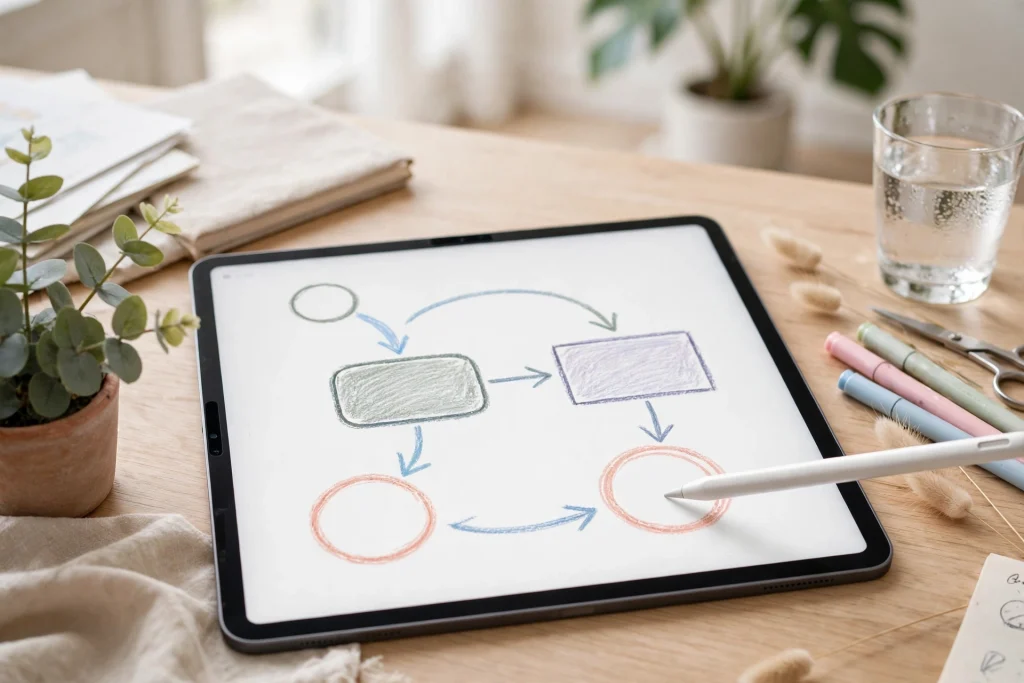
If you have ever tried to draw a circle by hand in a digital planner and ended up with a wobbly oval, the GoodNotes shapes tool is the feature that fixes that frustration in seconds. It turns a rough scribble into a clean, precise shape, so your planners, study notes, and diagrams look tidy without any drawing skill. Whether you want a neat box around an important date, an arrow pointing to a deadline, or a full flowchart for a project, this one tool does most of the heavy lifting.
This guide covers where to find the tool, how to draw each shape, how to change colours and line thickness, how to move and align shapes, and how to reuse them — plus practical examples you can copy into your own planner.
Quick answer: Tap the Shapes tool in the GoodNotes toolbar, draw a rough shape with your finger or Apple Pencil, and hold still at the end of the stroke until GoodNotes snaps it into a perfect version. Then tap the shape to change its fill colour, outline colour, and line thickness, or drag its handles to resize and rotate it.
What Is the GoodNotes Shapes Tool?
The GoodNotes shapes tool is a drawing mode that recognises the shape you sketch and replaces it with a clean, geometrically perfect version. Draw a rough circle and it becomes a true circle. Sketch a lopsided rectangle and it becomes a rectangle with straight edges and square corners. Draw a wobbly arrow and it becomes a straight arrow with a sharp head.
That matters because hand-drawn notes are fast and personal, but they can quickly look messy when you need structure. A planner page full of uneven boxes and crooked lines is harder to read and harder to trust. Clean shapes give your pages visual order: they separate sections, highlight priorities, and show relationships between ideas at a glance.
Where to Find the Shapes Tool in GoodNotes 6
Open any notebook or planner in GoodNotes 6 and look at the toolbar at the top of the screen. The Shapes tool sits among the main drawing tools, next to the pen, highlighter, eraser, and Lasso tool. Its icon looks like a circle overlapping a square.
If you do not see it, tap the three-dot menu in the toolbar and check that the Shapes tool is enabled. You can also rearrange the toolbar to move it closer to the pen if you use it often. On iPad, the toolbar is at the top by default; on Mac, it sits in a similar position.
How to Use the GoodNotes Shapes Tool: Your First Perfect Shape
Drawing your first shape takes less than a minute once you know the hold-and-snap gesture. The trick is the pause at the end: GoodNotes needs a brief moment to recognise what you drew. If you lift your Pencil too quickly, your rough sketch stays rough.
Follow these steps to draw a perfect circle:
- Tap the Shapes tool in the toolbar. It should highlight to show it is active.
- Choose your stroke colour and thickness by tapping the Shapes tool a second time. Pick a colour that stands out and a medium line weight.
- Draw a rough circle anywhere on the page with your finger or Apple Pencil. A loose loop is fine.
- Hold still at the end of the stroke for about a second without lifting your Pencil. You will see the rough line snap into a clean, round circle.
- Lift your Pencil once the shape has snapped into place.
- Tap the shape to select it. Handles appear around it, with a small toolbar for fill, colour, and line options.
- Adjust the shape if needed: drag a corner handle to resize it, drag the shape itself to move it, or change its fill colour from the pop-up menu.
That same hold-and-snap gesture works for every supported shape. Draw it roughly, hold, wait for the snap, and then refine it.
Which Shapes Does GoodNotes Support?
GoodNotes recognises a useful set of basic shapes. You do not get an endless shape library, but these cover almost everything a planner or study note needs.
- Line: a straight line. Use it to underline headings, divide sections, or connect two ideas.
- Arrow: a straight line with an arrowhead. Use it to show direction, sequence, or cause and effect.
- Rectangle: a box with four straight sides. Ideal for callout boxes, section headers, and table cells.
- Circle and ellipse: a round circle or a stretched oval. Use circles to highlight dates or numbers, and ellipses to ring a whole phrase.
- Triangle: a three-sided shape. Useful for warning markers, pointers, and simple pyramid diagrams.
- Other polygons: GoodNotes also recognises shapes such as pentagons and other multi-sided figures. If your sketch is close to a recognised polygon, GoodNotes will snap it into the clean version.
How to Fill a Shape With Colour and Change the Stroke
An outline-only shape is useful, but a filled shape is far easier to read. Fill colour turns a plain box into a highlight, a category marker, or a progress block. To fill a shape, tap it to select it, then tap the fill option in the small pop-up toolbar. Choose a colour from the palette, or use the colour picker for a custom shade. A light fill with a darker outline usually reads best: a pale yellow fill with a dark grey outline for a reminder box, for example.
To change the outline, tap the stroke colour option in the same menu and pick a new colour. You can also change the stroke thickness there. A thin stroke looks neat and subtle, while a thick stroke makes a shape stand out as a header or warning. Use thick strokes sparingly, or every shape will shout and none of them will stand out.
You can also set your fill and stroke before you draw. Tap the Shapes tool twice to open its settings, choose your colours and thickness, and every shape you draw next will use those settings until you change them. This saves time when you are building a diagram with a consistent colour scheme.
How to Resize, Rotate, and Move Shapes
Tap a shape to select it and small blue handles appear around its edges. Drag a corner handle to resize it, or drag a side handle to stretch it in one direction. To turn a circle into a wide ellipse, drag the side handle outward. To move a shape, tap and hold inside it, then drag it to its new position. GoodNotes shows a faint preview as you drag, so you can line it up before you let go. For fine adjustments, zoom in first; small movements are much easier to control at higher zoom.
To rotate a shape, drag the rotation handle that appears above the selected shape in a circular motion. Rotation is most useful for arrows and triangles: turn an arrow to point in the exact direction you need, or tilt a triangle so it points at a specific note.
How to Snap Shapes Together and Align Them
A single neat shape is nice. A row of neatly aligned shapes is what makes a page look professional. When you move a shape close to another shape, text box, or page element, GoodNotes shows faint guide lines to help you line up their edges or centres. Use these guides to keep boxes in a straight row, centre a title shape over a column, or space arrows evenly between flowchart steps.
How to Duplicate Shapes
Duplicating saves you from redrawing the same shape with the same colours over and over. It is the fastest way to build a consistent diagram, because every copy keeps the original fill, stroke colour, and line thickness. To duplicate a shape, tap it to select it, then tap the duplicate option in the pop-up toolbar. A copy appears slightly offset from the original. Drag it to its new position and adjust its size if needed.
How to Save a Shape to Elements for Reuse
If you use the same shape again and again, save it to Elements so you never have to recreate it. Elements is the GoodNotes library for reusable stickers, shapes, and drawings, and it works across all your notebooks. To save a shape, select it with the Lasso tool, tap the Elements option, and add it to a collection. Give the collection a clear name, such as “Planner Shapes” or “Flowchart Kit”, so you can find it later.
Building Flowcharts, Mind Maps, Tables, and Timelines in Your Planner
Flowcharts
Start with a rectangle for each step, then connect the rectangles with arrows showing the order. Put the first step at the top and work downward, or start on the left and work across the page. Keep the text inside each box short — a few words per step is enough. If a step leads to a decision, use a triangle for that point, then draw one arrow for “yes” and one for “no” to show the two paths.
Mind Maps
Put your central idea in a circle in the middle of the page. Draw lines or arrows outward to your main themes, and put each theme in its own shape. From each theme, branch out again to smaller ideas, using smaller shapes or plain lines. Keep each branch short and visual: a different colour for each main branch, and a keyword or two rather than full sentences.
Tables
Draw one rectangle as your first cell, duplicate it, and snap the copies together in rows and columns to form a table. Use a darker fill or a thicker stroke for the header row so it stands out. Tables are perfect for weekly trackers, budget summaries, and study revision grids.
Timelines
Draw a long horizontal line across the page, then add short vertical lines or small circles at each key date. Label each point with the date and a short description. Timelines work well for project plans, study schedules, and travel itineraries.
Combining Shapes With the Lasso Tool and Handwriting
Shapes work best alongside your handwriting, not instead of it. Use shapes for structure and handwriting for content: a shape frames the idea, and your handwriting fills in the detail. A rectangle around a handwritten reminder, a circle around a key date, or an arrow from a note to its action step all combine the two strengths.
The Lasso tool ties this together. Use it to select a shape together with the handwriting inside or beside it, then move the whole group as one unit. This is useful when you want to rearrange a section without rebuilding it.
Common Mistakes and How to Fix Them
Shapes Not Snapping
If your shape stays rough instead of snapping into a clean version, you are almost certainly lifting your Pencil too soon. Draw the shape, hold still for a full second at the end, and wait for the snap before you lift. Also check that the Shapes tool is actually active; if the pen tool is selected instead, GoodNotes will treat your stroke as handwriting and will not correct it. Drawing the shape larger can help too.
Fill Covering Your Text
A filled shape placed over handwriting will hide the writing underneath it. This happens when you draw the shape after writing the text, or when you move a filled shape on top of existing notes. Fix it by moving the shape first, then writing inside it.
Wrong Layer Order
Shapes, handwriting, and stickers stack in the order you create them, and the newest item sits on top. If a shape hides part of a sticker or a text box, it was probably created later. Undo the shape and redraw it before the other element, or move the shape aside and place it again. Planning the order — background shapes first, then text and details — avoids most layer problems.
If you are still learning how shapes fit into a full planning setup, the pillar guide to using a digital planner in GoodNotes shows how shapes, hyperlinks, and handwriting work together on a real planner page.
Practical Examples You Can Copy
These three examples use only the shapes and techniques from this guide. Try each one on a blank page, then adapt it to your own planner.
A Weekly Habit Diagram
Draw a row of seven small rectangles across the top of the page, one for each day of the week. Under each day, draw a small circle for each habit you want to track, such as exercise, reading, or drinking water. Colour a circle in when you complete the habit, and leave it empty when you miss it. At the end of the week, you can see your pattern at a glance.
A Project Flowchart
Start with a rectangle labelled “Idea”, then an arrow down to “Plan”, then another arrow to “Do the work”, then “Review”, then “Publish”. Add a triangle at the review step for the decision: if the work is ready, follow the arrow to “Publish”; if not, follow an arrow back to “Do the work”. Colour the decision shape differently so it stands out. A 12-Tab Digital Notebook for GoodNotes gives you plenty of blank pages to keep one flowchart per project.
A Mind Map for Brainstorming
Write your topic in a large circle in the centre of a blank page — for example, “Birthday party”. Draw four arrows outward to four theme circles: “Food”, “Guests”, “Decorations”, and “Activities”. Under each theme, add two or three smaller circles with specific ideas, such as “Cake” and “Snacks” under “Food”. When you have finished, circle your three favourite ideas with a thicker outline to turn a brainstorm into a shortlist. For a larger canvas, try the same exercise on a digital whiteboard in GoodNotes, where you can zoom out and see the whole map at once.
Frequently Asked Questions
Does the GoodNotes shapes tool work on iPhone and Mac as well as iPad?
Yes. The Shapes tool is available in GoodNotes 6 on iPad, iPhone, and Mac, and the hold-to-snap gesture works on all three. On iPad and iPhone you can draw with your finger or Apple Pencil; on Mac you draw with a trackpad or mouse, so draw shapes a little larger and hold a moment longer to give GoodNotes time to recognise them.
Can I write text inside a shape?
You cannot type directly inside a shape as you would in a word processor. Instead, draw the shape first, then switch to the pen tool and write inside it by hand, or add a text box on top of the shape and type your text there.
Why does my circle keep turning into an oval or a scribble?
This usually means you lifted your Pencil before GoodNotes finished recognising the shape, or you drew the shape too small or too quickly. Slow down, draw a clear loop, and hold still at the end of the stroke for about a second.
Can I save a whole diagram, not just a single shape?
Yes. Use the Lasso tool to select the entire diagram — all its shapes, arrows, and handwritten labels — then save the selection to Elements as one item. Saving complete diagrams is the fastest way to reuse a flowchart or tracker week after week without rebuilding it.
Start Drawing Cleaner Diagrams Today
The GoodNotes shapes tool rewards a small amount of practice with a large improvement in how your notes look. Draw a shape, hold until it snaps, then fill, resize, and align it until it sits exactly where you want it. To give those diagrams a proper home, try them inside the Minimalist Undated Digital Life Planner for GoodNotes — its clean, undated pages are an ideal canvas for flowcharts, habit diagrams, and mind maps you will actually want to revisit.
Temply Studio
Stop chasing your goals with sticky notes and scattered notebooks. Our premium digital planners and Canva templates are designed to help you plan with intention, stay consistent, and actually enjoy the process.
Questions about this guide?
Ask about the planner, share how you use it, or tell us what to cover next. Your email stays private.