

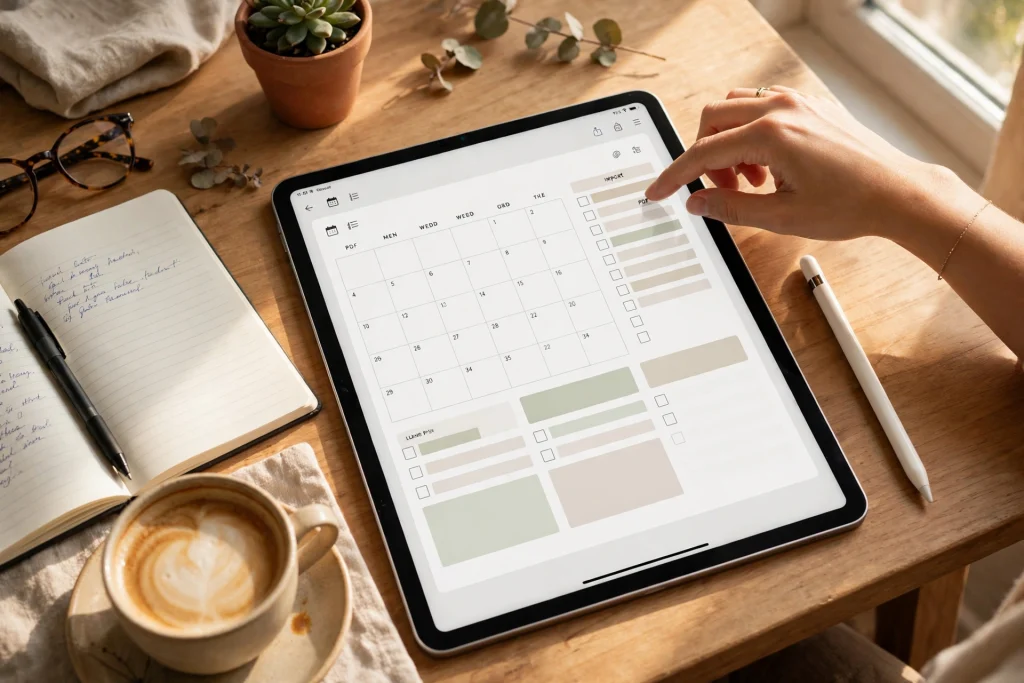
Quick answer: To import a PDF planner into GoodNotes, open GoodNotes, tap the + (New) button, choose Import, pick your PDF file, choose Import as New Document, and your planner appears as a new notebook. The whole process takes under a minute — and if your PDF has hyperlinked tabs, they work straight away.
So you have just bought (or downloaded) a beautiful PDF planner — and now you want to actually use it. The good news is that learning how to import a PDF planner into GoodNotes is one of the easiest things you will do on your iPad. There is no conversion software, no fiddly file wrangling, and no subscription required. If you can attach a file to an email, you can do this.
In this guide, I will walk you through every import method — from your Files app, from email, from Safari, and from a cloud drive — then show you how to check that your hyperlinks work, how to duplicate pages for daily reuse, and how to fix the handful of problems that occasionally trip people up. By the end, your planner will be open, tappable, and ready for your first entry.
What You Need Before You Start
Before you import anything, make sure you have three things ready:
- GoodNotes installed — GoodNotes 5 or GoodNotes 6 on iPad (or iPhone/Mac). The steps below are written for GoodNotes 6, but GoodNotes 5 is almost identical.
- Your PDF planner file — saved somewhere your iPad can reach: the Files app, iCloud Drive, Google Drive, Dropbox, your email inbox, or even a web download.
- Enough storage — a typical hyperlinked planner is 5–30 MB. If your iPad is nearly full, free up space first, or the import may silently fail.
One quick check: open the PDF once in the Files app and tap a tab link (for example, “January” or “Weekly”). If the link jumps to the right page there, the file is hyperlinked correctly and will behave the same way inside GoodNotes.
Method 1: Import from Inside GoodNotes (Fastest)
This is the method most people use, and it takes about thirty seconds.
- Open GoodNotes and go to the Library (the documents view).
- Tap the + button (labelled “New”) at the top of the screen.
- Choose Import from the menu.
- Browse to your PDF file — in iCloud Drive, On My iPad, or another location — and tap it.
- When GoodNotes asks, choose Import as New Document. (The other option, “Import to Current Document”, adds the PDF’s pages into a notebook you already have open — useful later, but not what you want for a fresh planner.)
- Wait a few seconds while GoodNotes processes the file. Your planner appears as a new notebook in the Library.
- Tap it to open it — and tap a tab to confirm the hyperlinks work.
That is the whole process. If you want to rename the notebook, long-press its cover in the Library and choose Rename. Give it a name you will recognise at a glance, such as “2027 Life Planner” or “Daily Planner — Undated”.
Method 2: Import from the Files App
If your PDF is already sitting in the Files app, you do not even need to open GoodNotes first.
- Open the Files app and find your PDF planner.
- Long-press the file and tap Share.
- In the share sheet, tap Open in GoodNotes (you may need to scroll the app row or tap “More” to find it).
- Choose Import as New Document.
- GoodNotes opens with your planner ready to use.
This method is handy when you have just downloaded a planner from a shop or a creator’s website, because the file usually lands in your Downloads folder in Files. It is also the quickest way to import several planners in a row: share one, switch back to Files, share the next.
Method 3: Import from Email, Safari, or a Cloud Drive
PDF planners arrive from all sorts of places. The pattern is always the same: open the file, tap Share, choose GoodNotes.
From an email attachment
Open the email, tap the PDF attachment to preview it, then tap the Share icon and choose Open in GoodNotes. If the attachment is large, wait for the download to finish first — the share icon stays greyed out until then.
From Safari (a direct download link)
Tap the download link. Safari saves the PDF to your Downloads folder. Tap the downloads icon in the address bar, tap the file to open it, then tap Share and choose Open in GoodNotes.
From Google Drive or Dropbox
Open the file in the Drive or Dropbox app, tap the three-dot menu (or the Share icon), and choose Open in → GoodNotes. Alternatively, use the Files app’s built-in Drive/Dropbox locations and follow Method 2 — it is usually faster.
After the Import: 5 Things to Set Up Straight Away
Importing the file is only half the job. Spend five minutes on these setup steps and your planner will feel like it was made for you.
1. Check the hyperlinks
Open your planner and tap every tab on the index page: months, weeks, daily pages, trackers. Each tap should jump instantly to the right page. If a link does nothing, the PDF may have been flattened (more on that in the troubleshooting section below) — but a properly made planner will work immediately.
Hyperlinked tabs are the whole reason a digital planner beats a printed one. If you are still choosing a planner, look for one that advertises working hyperlinks — for example, the Light Grey Hyperlinked Digital Planner for GoodNotes is built around tappable navigation, and the Minimalist Undated Digital Life Planner for GoodNotes works the same way.
2. Add it to your favourites
In the GoodNotes Library, long-press your planner and tap Add to Favourites (the star). Your daily planner will sit at the top of the Library, so you never have to scroll for it at 7am.
3. Duplicate pages you will reuse
Most planners include a single copy of each daily or weekly page. When you reach the end of a week, you need a fresh copy — and this is where GoodNotes shines.
- Open the page you want to copy (for example, the daily page).
- Tap the page thumbnail view (the four-squares icon at the top).
- Long-press the page thumbnail and tap Duplicate.
- Drag the duplicate to the position you want — right after the original, or at the end of the current week.
Repeat the process whenever you need a new week. Some people duplicate a whole month of daily pages in one sitting on a Sunday evening; others duplicate one day at a time. Either way works.
4. Choose your pen and paper settings
GoodNotes lets you set a default pen colour, thickness, and style per notebook. Pick a fine-tip ballpoint or fountain pen at a thickness you like, and choose a paper template colour if your planner’s pages feel too stark. These small choices make daily writing noticeably more pleasant.
5. Turn on iCloud sync and auto-backup
Go to GoodNotes Settings → iCloud Settings and confirm sync is on, so your planner follows you to iPhone and Mac. Then set up auto-backup (Settings → Auto Backup) to Google Drive, Dropbox, or OneDrive. A planner holds a year of your life — back it up before you need it, not after. Our full backup walkthrough is linked in the troubleshooting section below.
Import as New Document vs Import to Current Document
GoodNotes offers two import destinations, and picking the wrong one is the most common beginner mistake. Here is the difference:
- Import as New Document — creates a brand-new notebook from the PDF. Use this for a planner, a notebook, or any standalone file.
- Import to Current Document — inserts the PDF’s pages into the notebook you already have open, at the end (or wherever you choose). Use this to add extra pages — a meal plan, a packing list, a habit tracker — into an existing planner.
The second option is genuinely useful once your planner is set up. For example, you could import a printable habit tracker into your life planner rather than keeping it as a separate notebook. But for the first import of a planner, always choose New Document — importing a 300-page planner into another notebook by accident creates a mess that takes a while to undo.
Can You Import a Planner on iPhone or Mac?
Yes — the process is nearly identical. On iPhone, tap the + button in the Library and choose Import, or share a PDF from Files to GoodNotes. The smaller screen makes long writing sessions less comfortable, but it is perfect for checking your day on the go. On Mac, drag the PDF onto the GoodNotes window, or use File → Import. Everything syncs through iCloud, so a planner imported on your iPad appears on your other devices within minutes.
Troubleshooting: When the Import Does Not Work
The PDF opens but the tab links do nothing
This usually means the PDF was flattened — saved in a way that turned the links into plain images. It happens when a planner is exported from Canva with the wrong settings, or re-saved by a PDF app that strips links. Ask the seller for a fresh copy, or re-export the file from its original app with hyperlinks enabled. GoodNotes cannot restore links that are not in the file.
The import stalls or GoodNotes crashes
Very large planner files (100+ MB, or planners with hundreds of high-resolution pages) can overwhelm older iPads. Close other apps, restart GoodNotes, and try again. If it still fails, ask the seller whether a lighter version exists, or split the PDF into sections (by quarter, for example) using a free tool like Preview on Mac and import each part separately.
The planner looks blurry or washed out
Zoom in: if the text sharpens, the file is fine and GoodNotes is just rendering a low-resolution preview. If it stays blurry, the PDF was exported at low quality. A planner designed for print at 150 dpi or higher will look crisp; anything below that will look soft on a retina display.
“Cannot open file” or the file is greyed out
Check the file extension. GoodNotes imports PDF files — a .zip file, a .goodnotes file from another app, or a Pages document will not import directly. If your planner arrived as a .zip (many shops send them this way), unzip it first: in the Files app, just tap the .zip file and iPadOS extracts it automatically. Then import the PDF inside.
Pages are in the wrong order
Some planners ship with the index first and the months in order, and some ship with extras (stickers, covers) at the end. If your pages feel scrambled, open the thumbnail view, long-press a page, and drag it to the right spot. You can also use the thumbnail view to delete duplicate cover pages or blank pages the seller included.
How to Organise Multiple Planners in GoodNotes
Once you know how to import a PDF planner into GoodNotes, it is tempting to import everything — and then your Library becomes a junk drawer. A little structure helps:
- Folders by area of life: Planning, Work, Study, Health, Journals. Put each planner in the folder where you will look for it.
- One planner per purpose: a life planner for daily planning, a notebook for freeform notes, and a dedicated tracker for habits or budgets. Three focused notebooks beat one giant one.
- Name files clearly: “2027 Life Planner” is searchable; “Planner FINAL v3 (2).pdf” is not.
- Archive old planners: at year end, move last year’s planner into an “Archive” folder instead of deleting it. Your old plans are a diary you will be glad to keep.
For a deeper system, pair your planner with a dedicated notebook: the 12-Tab Digital Notebook for GoodNotes works well as a companion for meeting notes, ideas, and lists that do not belong on a dated page.
What to Do on Day One with Your New Planner
Your planner is imported, the links work, and the backup is on. Now make it yours:
- Fill in the index and goals pages — a planner with your goals written in it gets used; a blank one gets forgotten.
- Write tomorrow’s top three tasks on the next daily page. Small, concrete, done by noon.
- Add one habit tracker — pick a single habit and track it for two weeks before adding more.
- Set a daily 5-minute planning habit — same time, same place, every day. Evening works best for most people: plan tomorrow before you close the iPad.
If you are new to digital planning altogether, start with our beginner’s guide: How to Use a Digital Planner in GoodNotes covers pens, erasers, stickers, and the daily workflow in plain language.
Frequently Asked Questions
Do I need to pay to import a PDF into GoodNotes?
No. Importing PDFs is a core GoodNotes feature and works on the free tier (up to 3 notebooks) as well as the full version. You only pay for GoodNotes itself, not for imports.
Will my hyperlinks still work after importing?
Yes, as long as the PDF actually contains links. GoodNotes preserves the links exactly as they are in the file. If links do not work, the file was flattened before you received it — the problem is in the PDF, not in GoodNotes.
Can I import a planner I made in Canva?
Yes. In Canva, download your design as PDF Standard (not PDF Print, and not flattened), making sure any links you added are preserved. Then import the PDF into GoodNotes using any method above. Note that Canva’s free export sometimes flattens links — if your tabs stop working, re-export and check Canva’s link settings.
How many planners can I import?
As many as your iPad storage allows. The free version of GoodNotes limits you to 3 notebooks; the paid version is unlimited. A typical planner is 5–30 MB, so even a modest iPad can hold dozens.
Can I import a PDF planner into GoodNotes on Android?
GoodNotes is available on Android (Samsung Galaxy Tab and other devices), and PDF import works the same way there. The menu labels may differ slightly, but the flow — New → Import → choose PDF → Import as New Document — is the same.
What if I import the wrong file?
Just delete the notebook from the Library (long-press → Delete) and import the right file. Deleting a notebook does not affect the original PDF, which stays in Files or wherever you imported it from.
Importing a PDF planner into GoodNotes takes less than a minute — but the five minutes of setup afterwards are what turn a file into a system you actually use. Check the links, favourite the planner, duplicate your first daily page, switch on backup, and write tomorrow’s top three tasks tonight. Your future self will thank you.
Ready to start planning? Browse the Minimalist Undated Digital Life Planner for GoodNotes — hyperlinked, undated so you can start any day of the year, and ready to import in under a minute.
Temply Studio
Stop chasing your goals with sticky notes and scattered notebooks. Our premium digital planners and Canva templates are designed to help you plan with intention, stay consistent, and actually enjoy the process.

Questions about this guide?
Ask about the planner, share how you use it, or tell us what to cover next. Your email stays private.